How to Set Up and Adjust Freight Calculations in the Floors App
Understanding how freight is calculated at both the product and category levels can help you avoid costly mistakes and ensure quotes are accurate. In the Floors app, freight charges can be set per product or automatically applied based on product category. Let’s walk through how it works, common pitfalls, and how to update your freight settings.
Freight Calculation Levels
-
Product-Level Freight: Added directly to the individual product when included in a quote.
-
Category-Level Freight: Applied automatically when you add a product from a specific category (like Hardwood). The amount is calculated per unit (e.g., per square foot).
Follow these steps to see and update how freight is applied.
Adjusting and Testing Category-Level Freight
Step 1: Open your project or quote. Choose a template and import materials relevant to your scenario.
Step 2: Add a material that belongs to the Hardwood category.
Step 3: Enter a quantity (for example, 200 square feet).
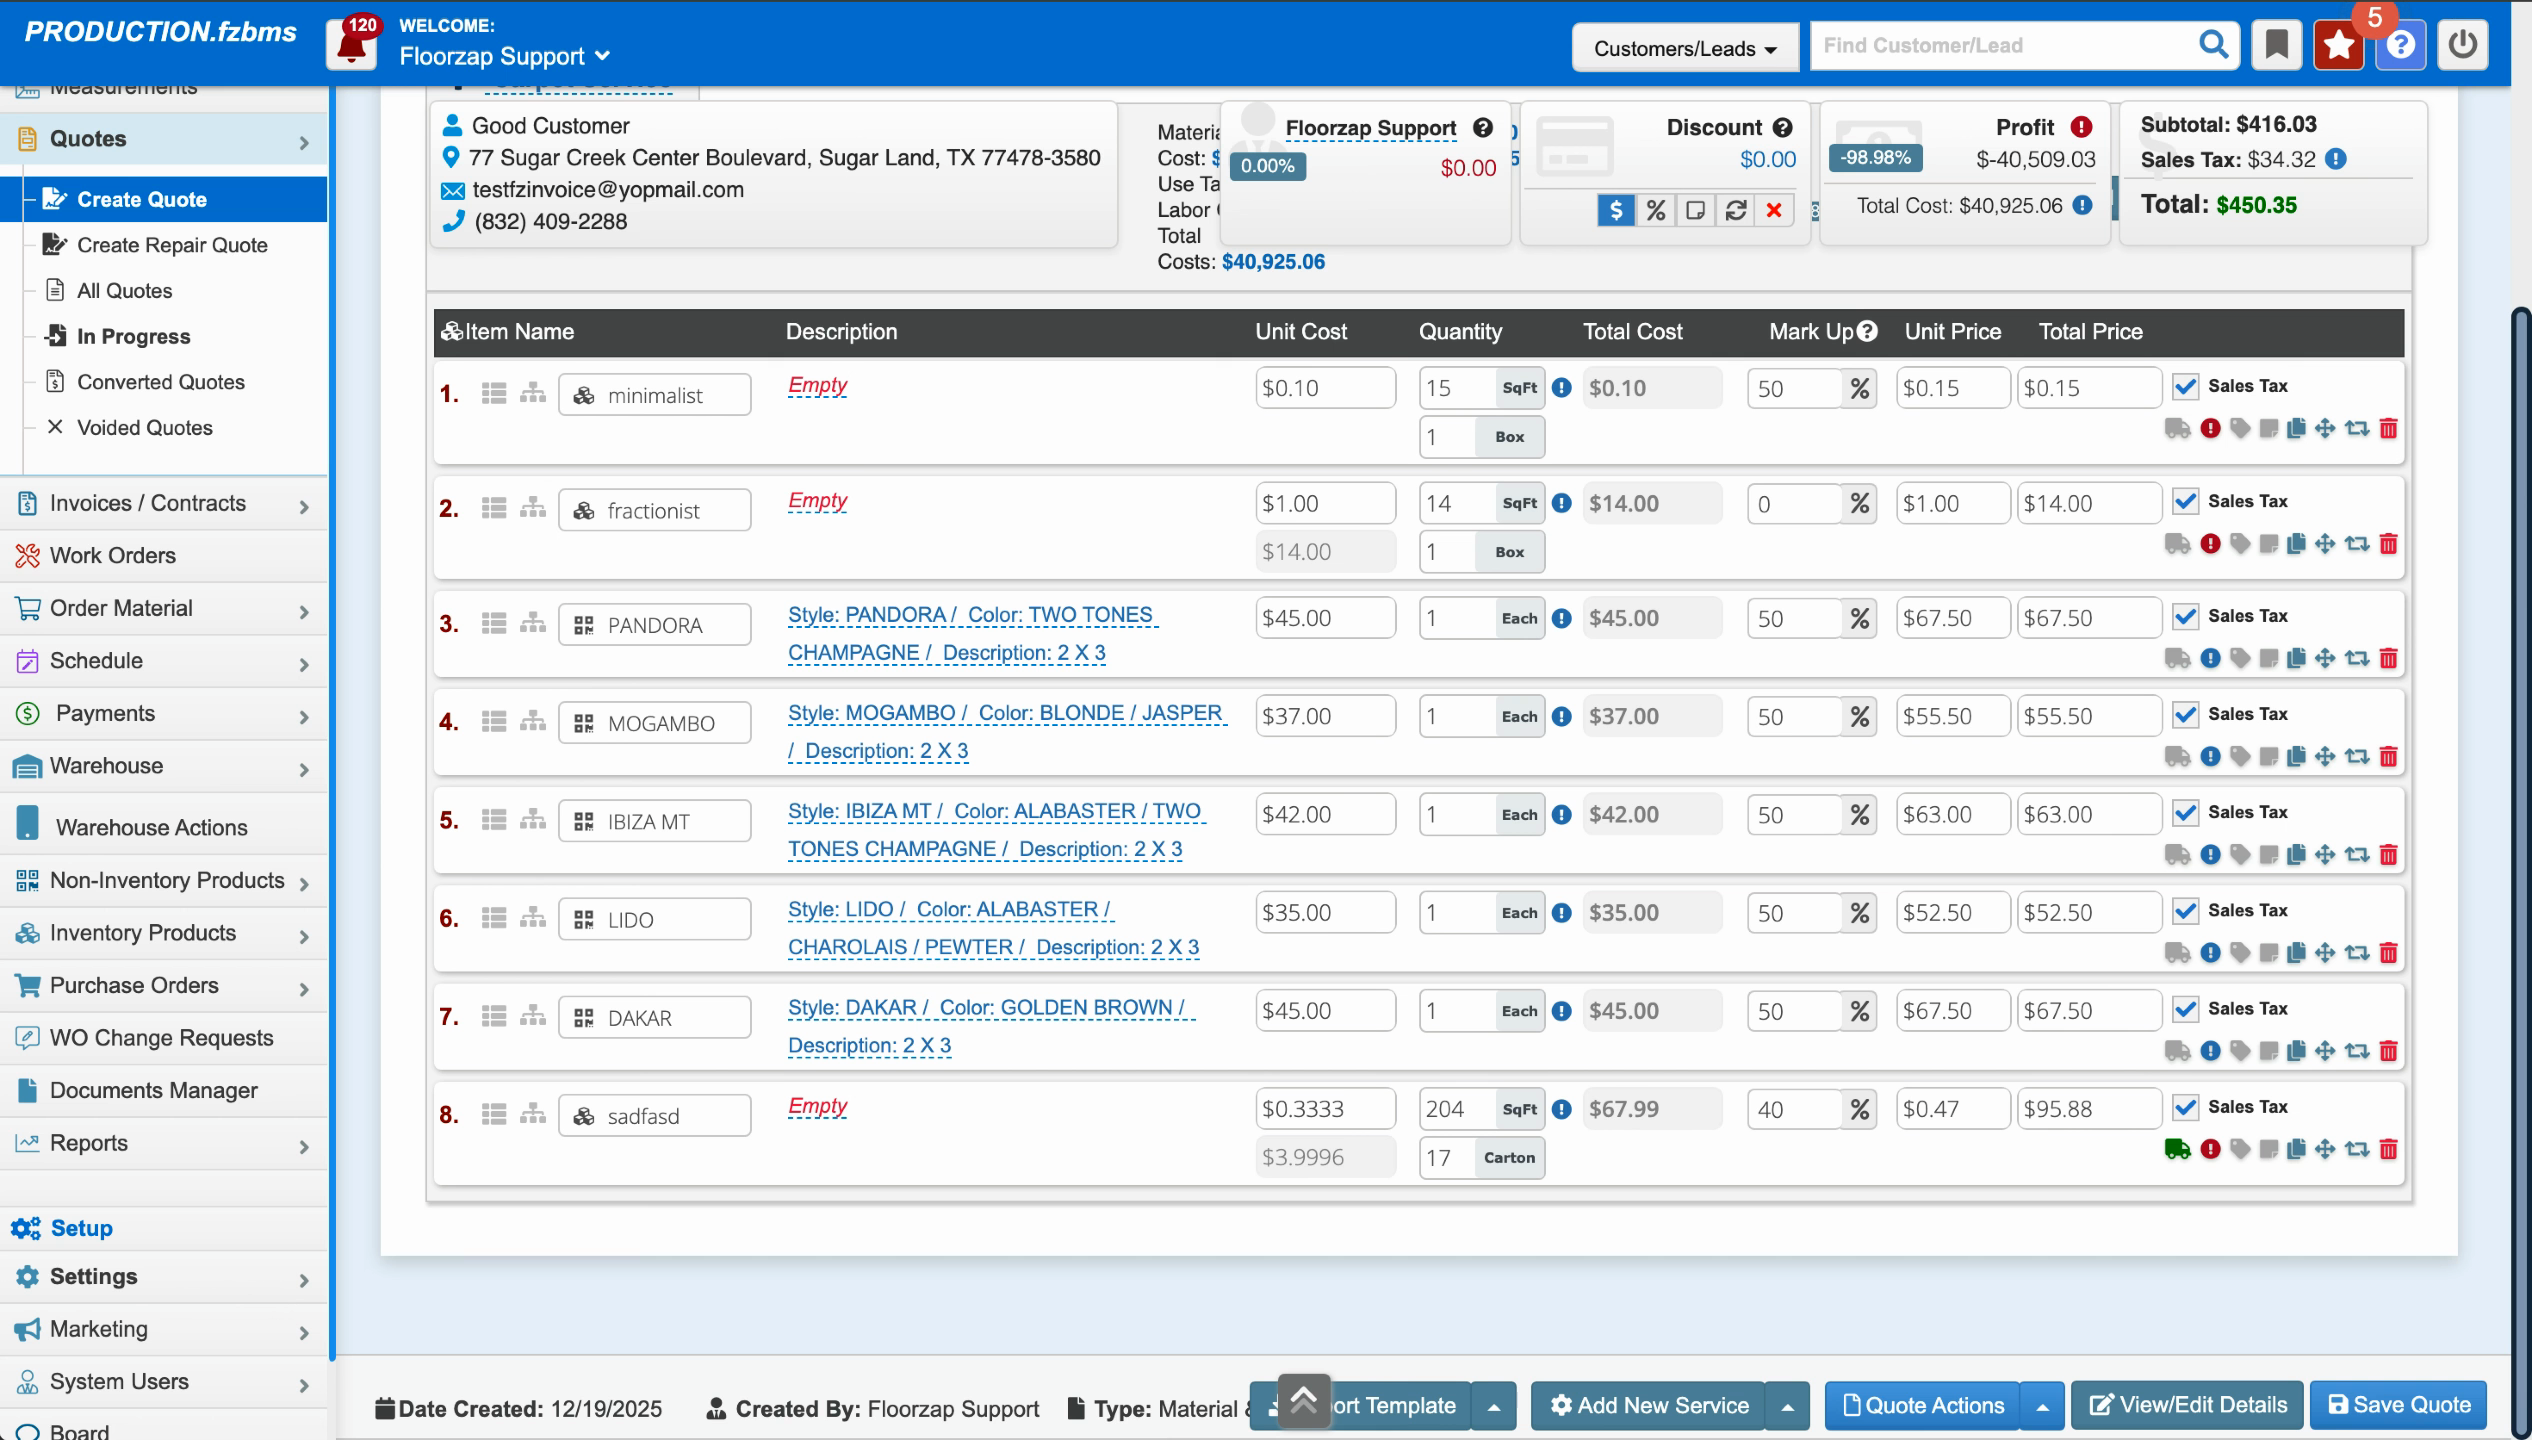
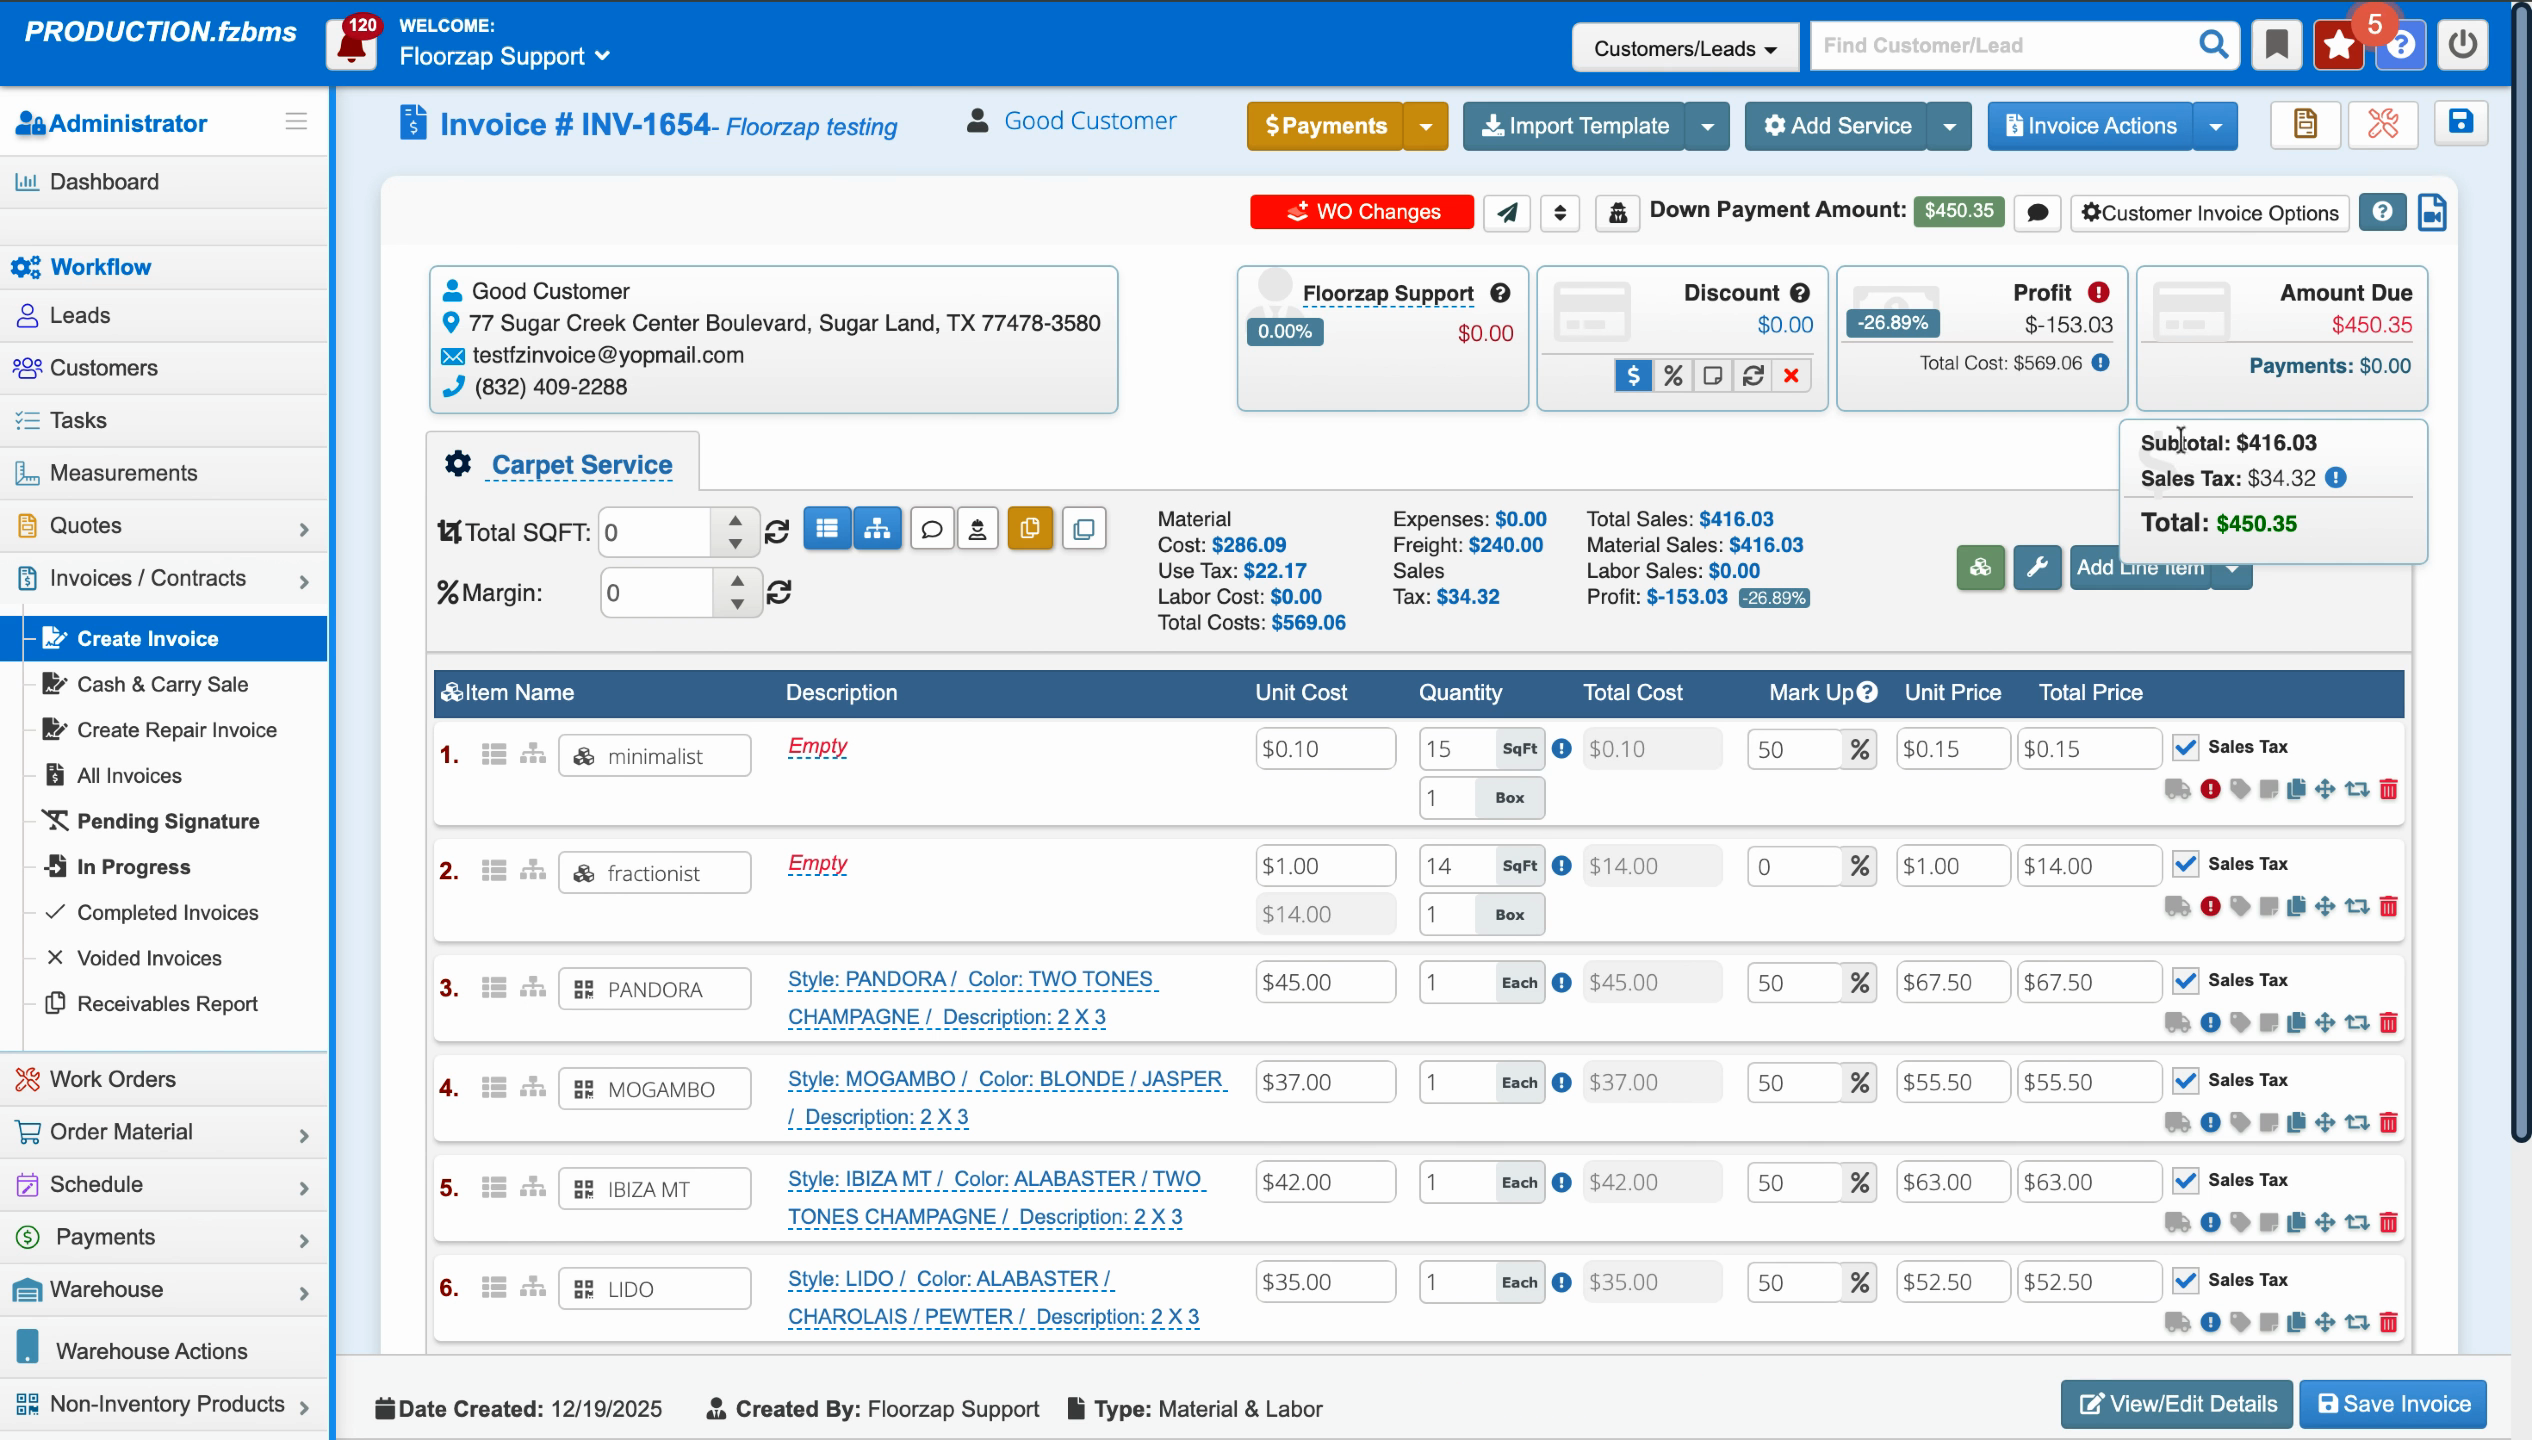
Step 4: Review the quote summary. Check the Freight amount calculated based on the category’s current freight rate.
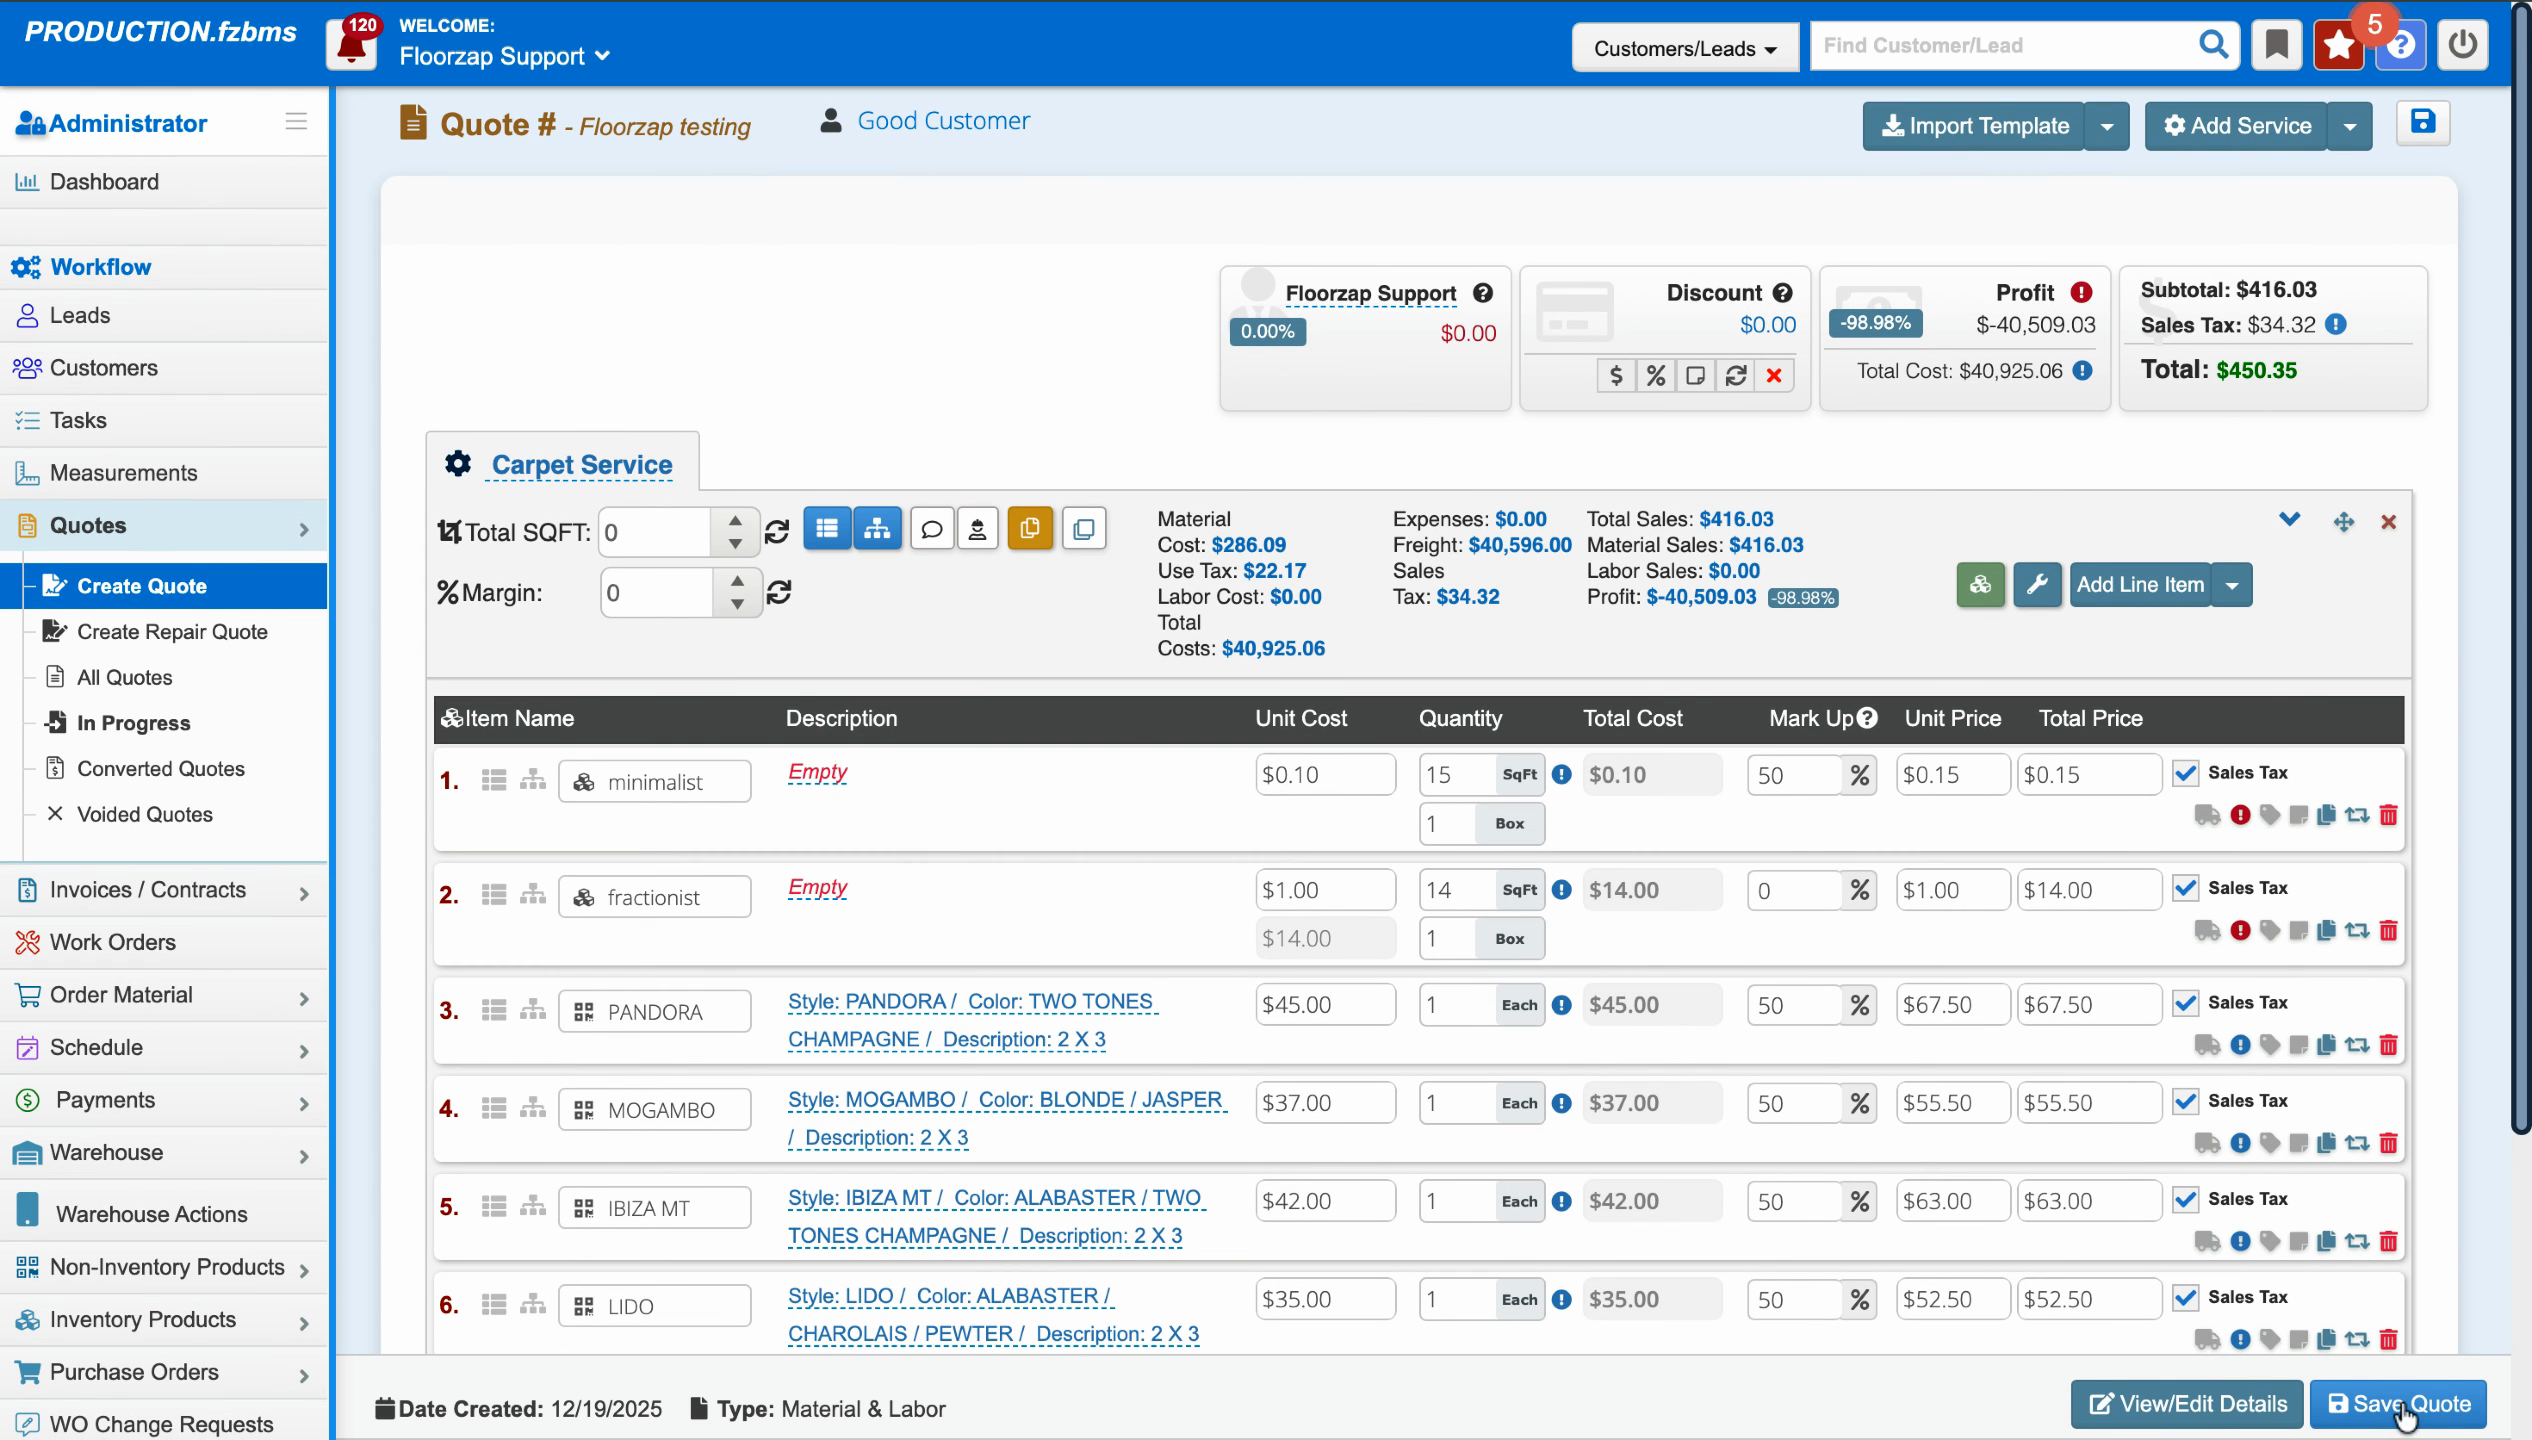
Step 5: Notice the freight calculation. In this case, with a rate of $199 per square foot, the total freight can be excessively high (such as $40,596), which indicates the rate was set incorrectly.
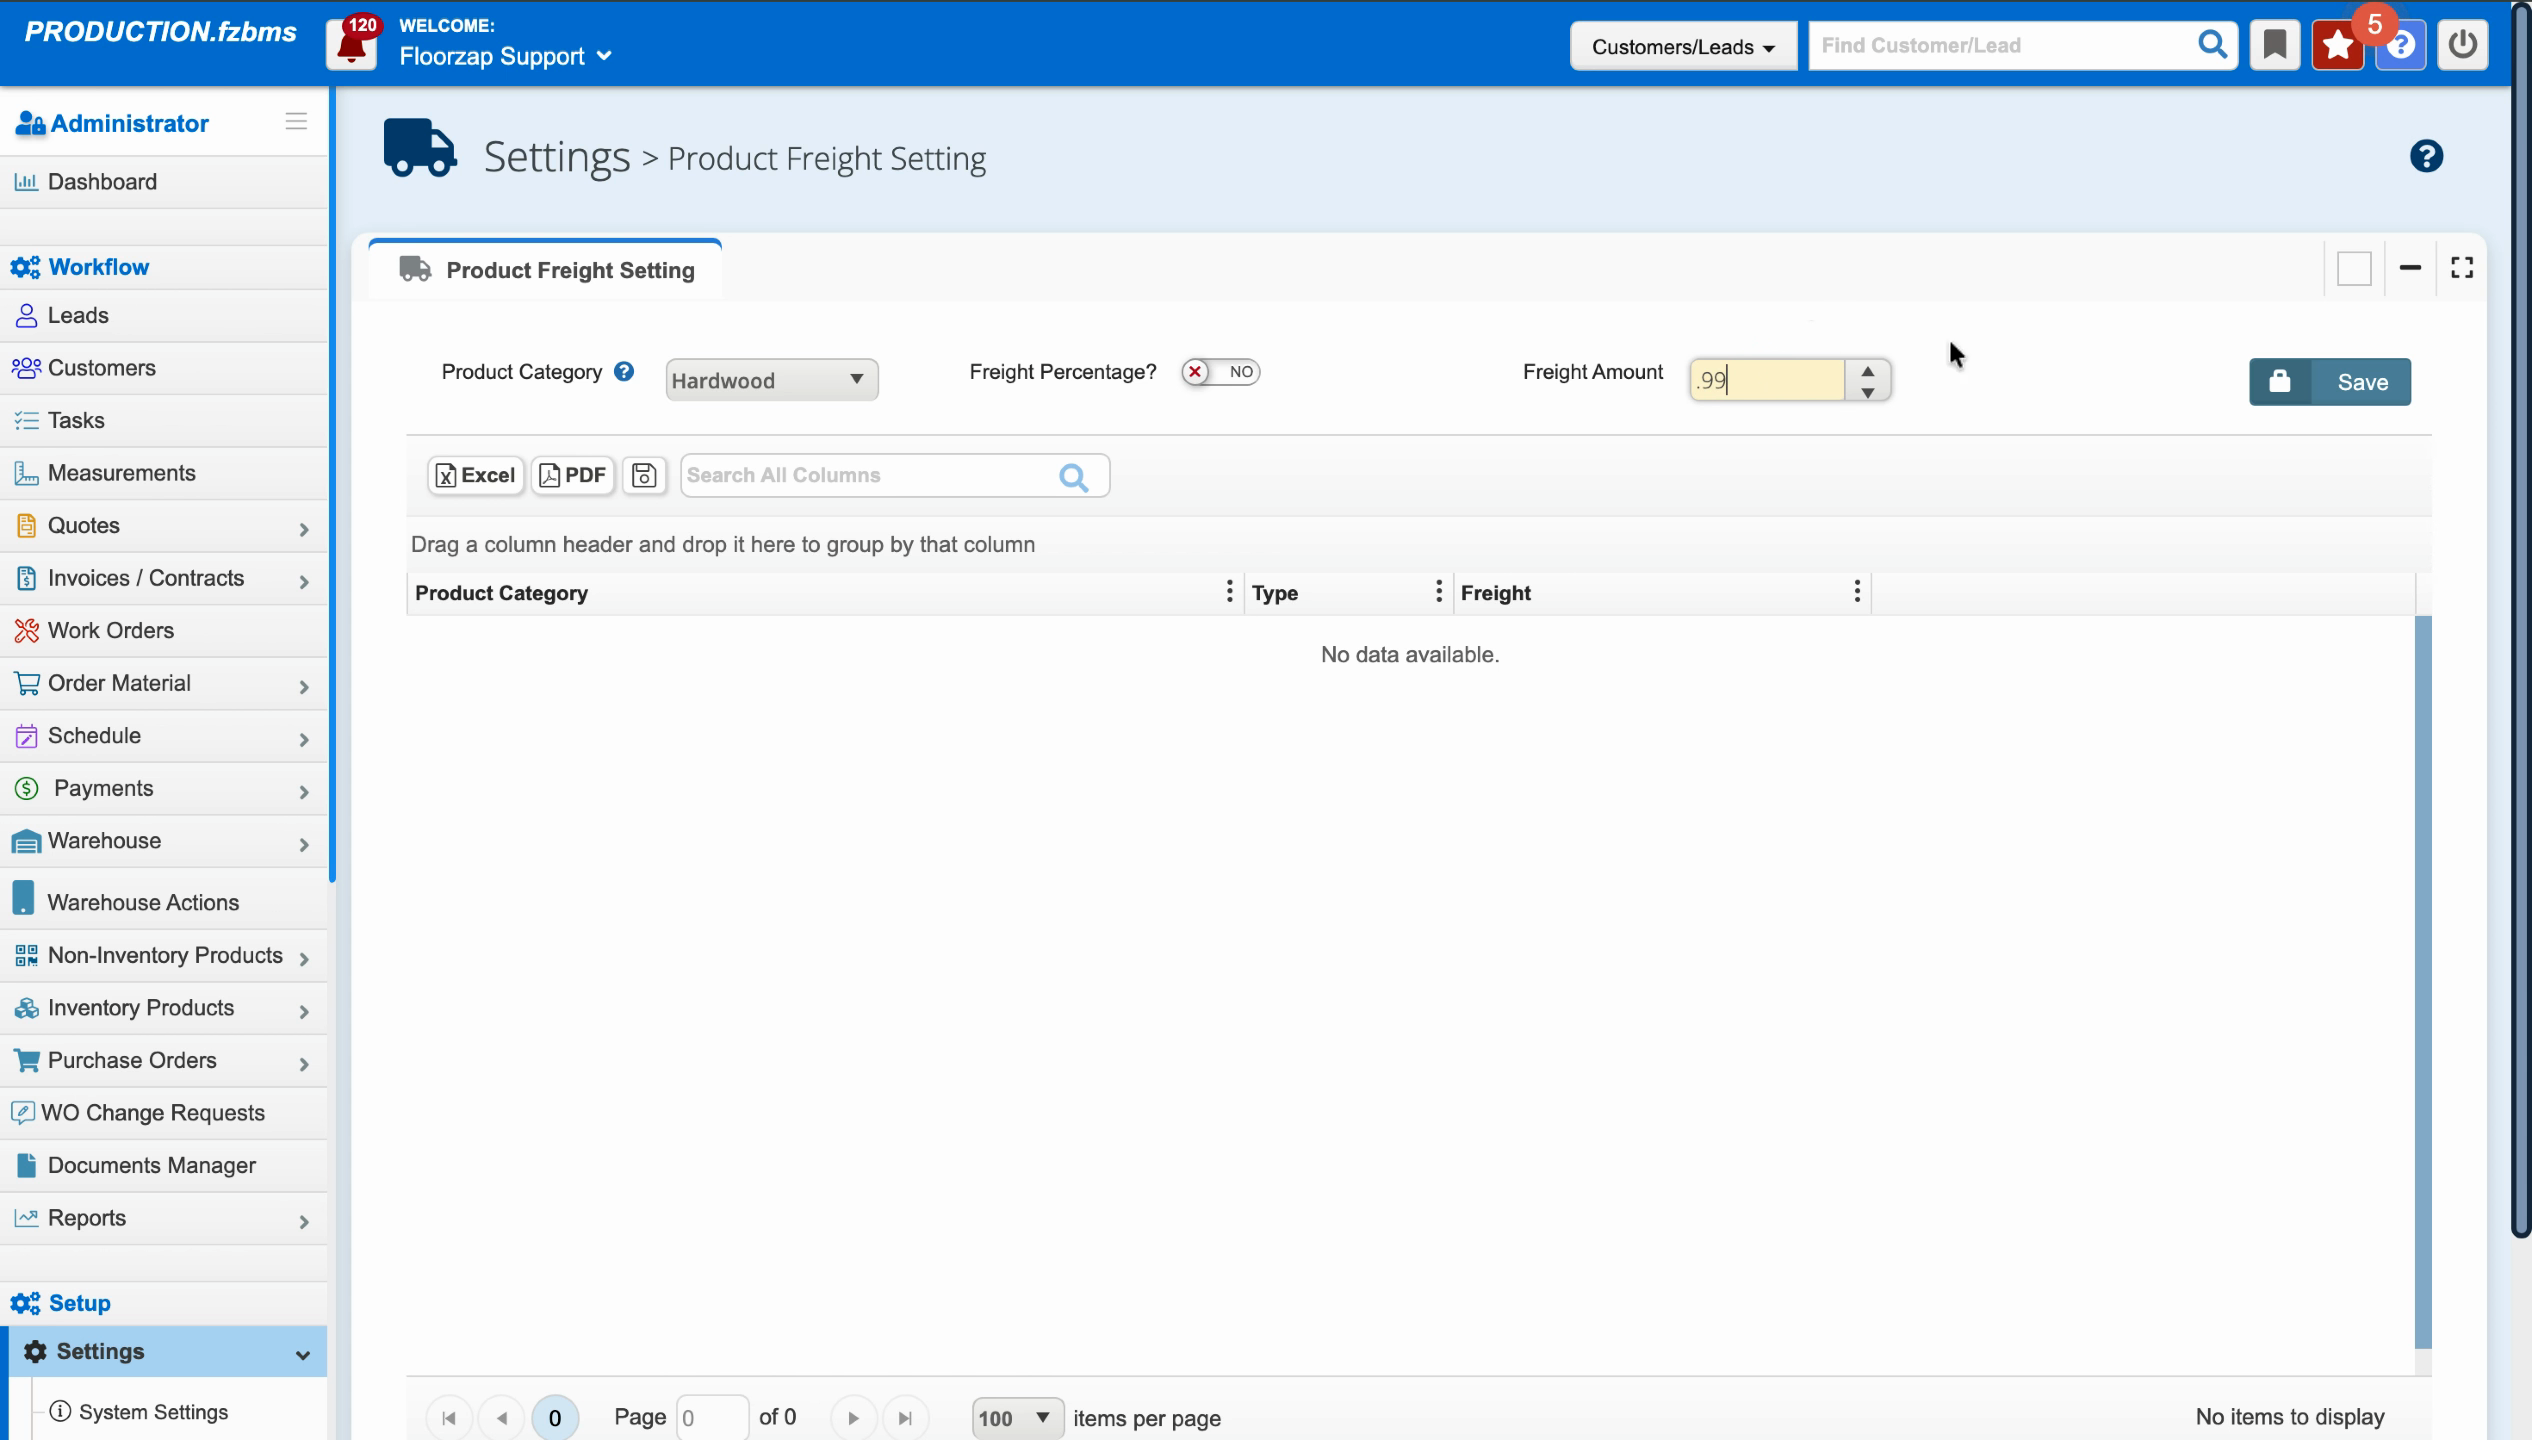
Editing Category Freight Rate
Step 1: Go to Settings in the Floors app.
Step 2: Select Integration.

Step 3: Scroll to Product Freight.
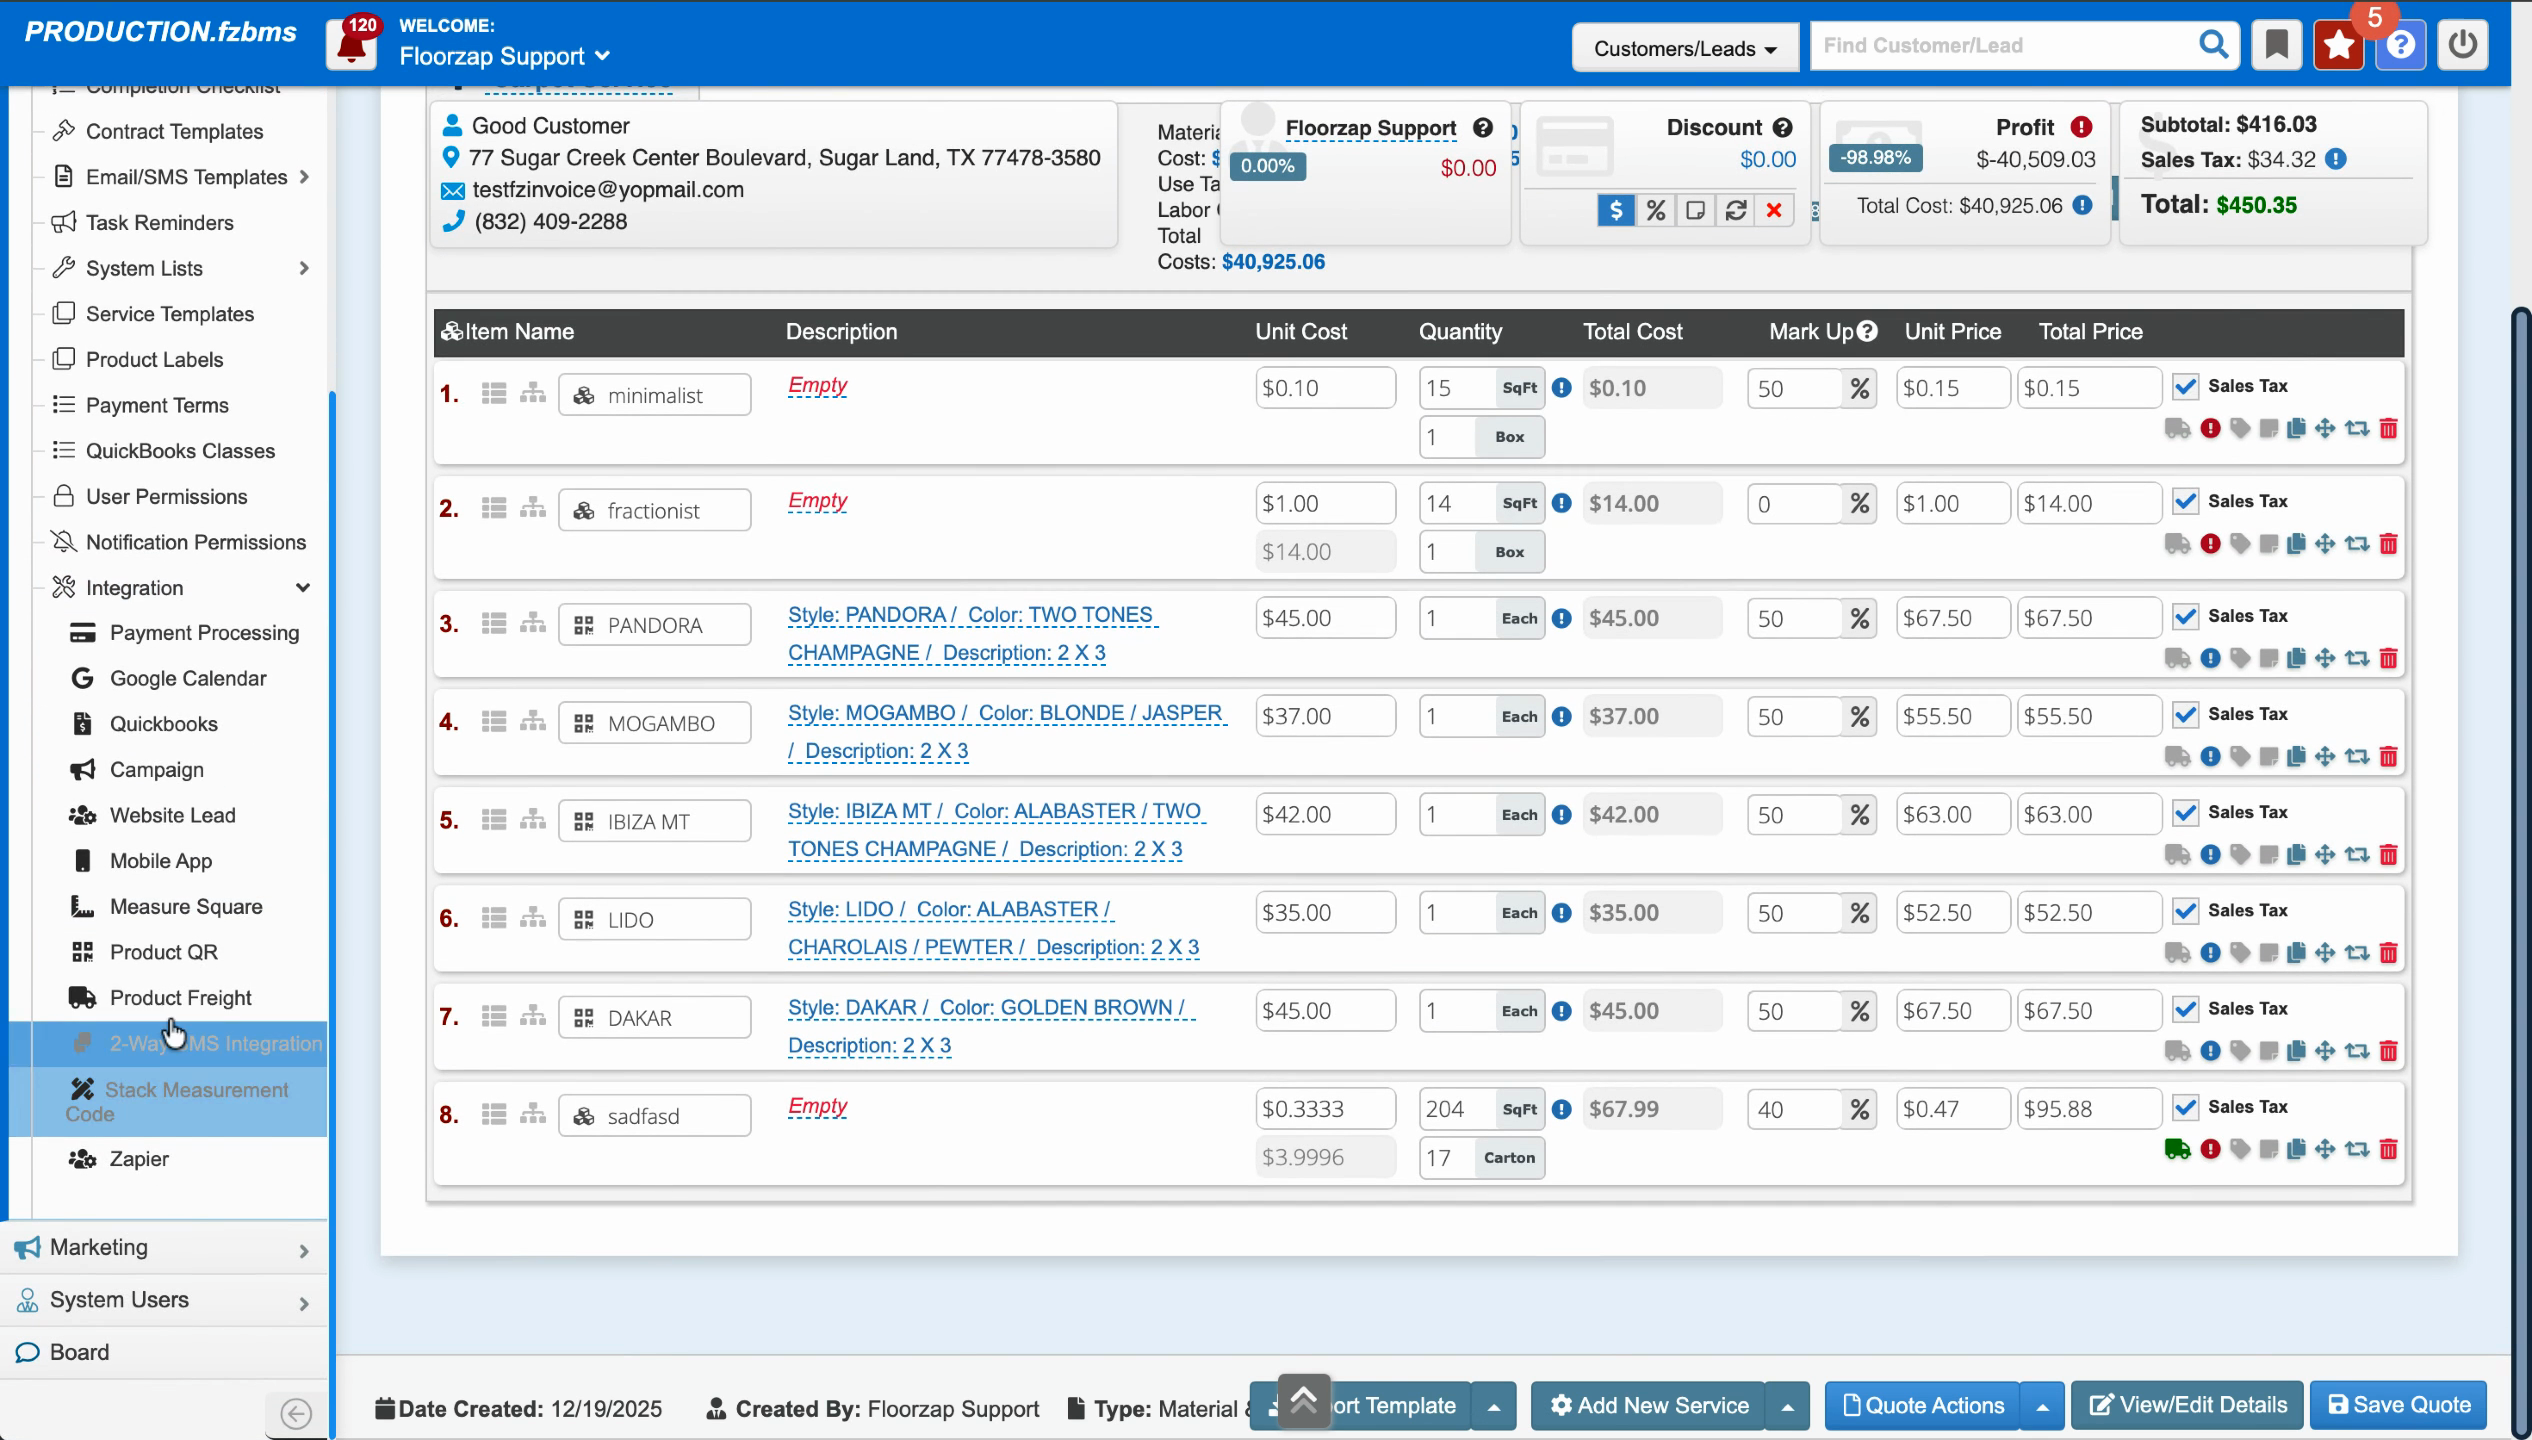
Step 4: Under Hardwood category, find the freight rate, and delete or edit the value.
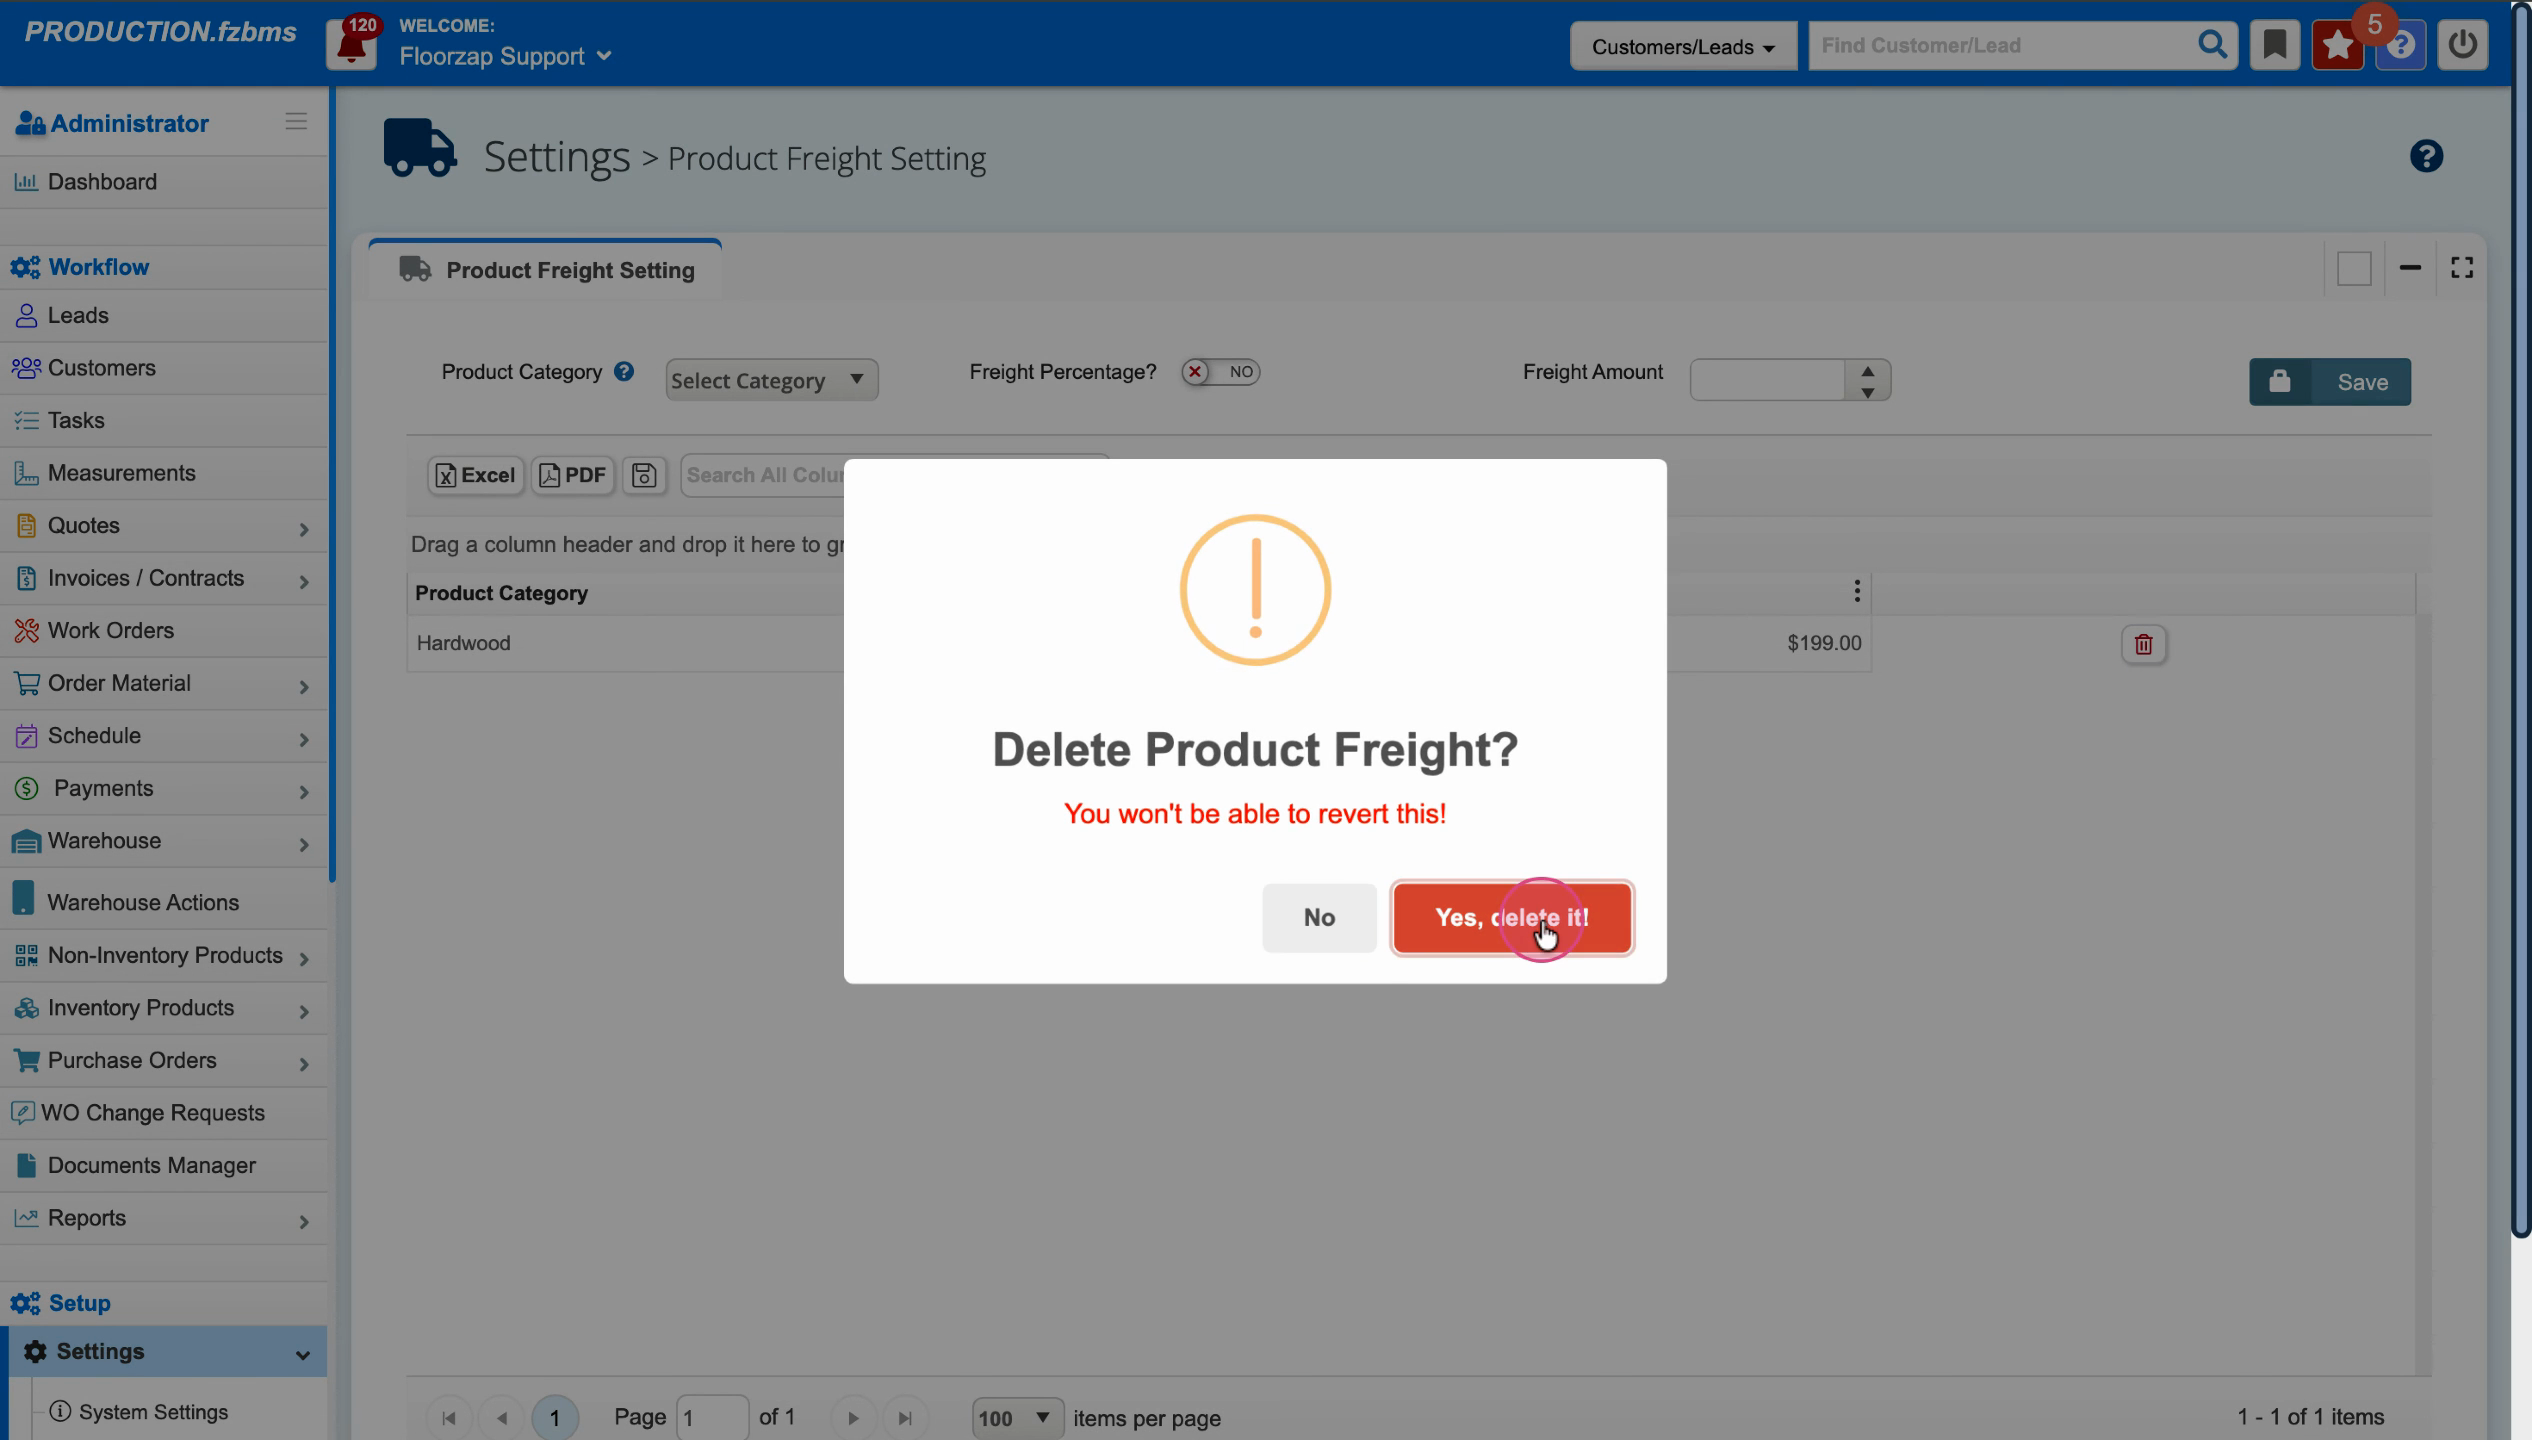
Step 5: Add the correct freight rate (for example, $0.99 per square foot) and click Save.
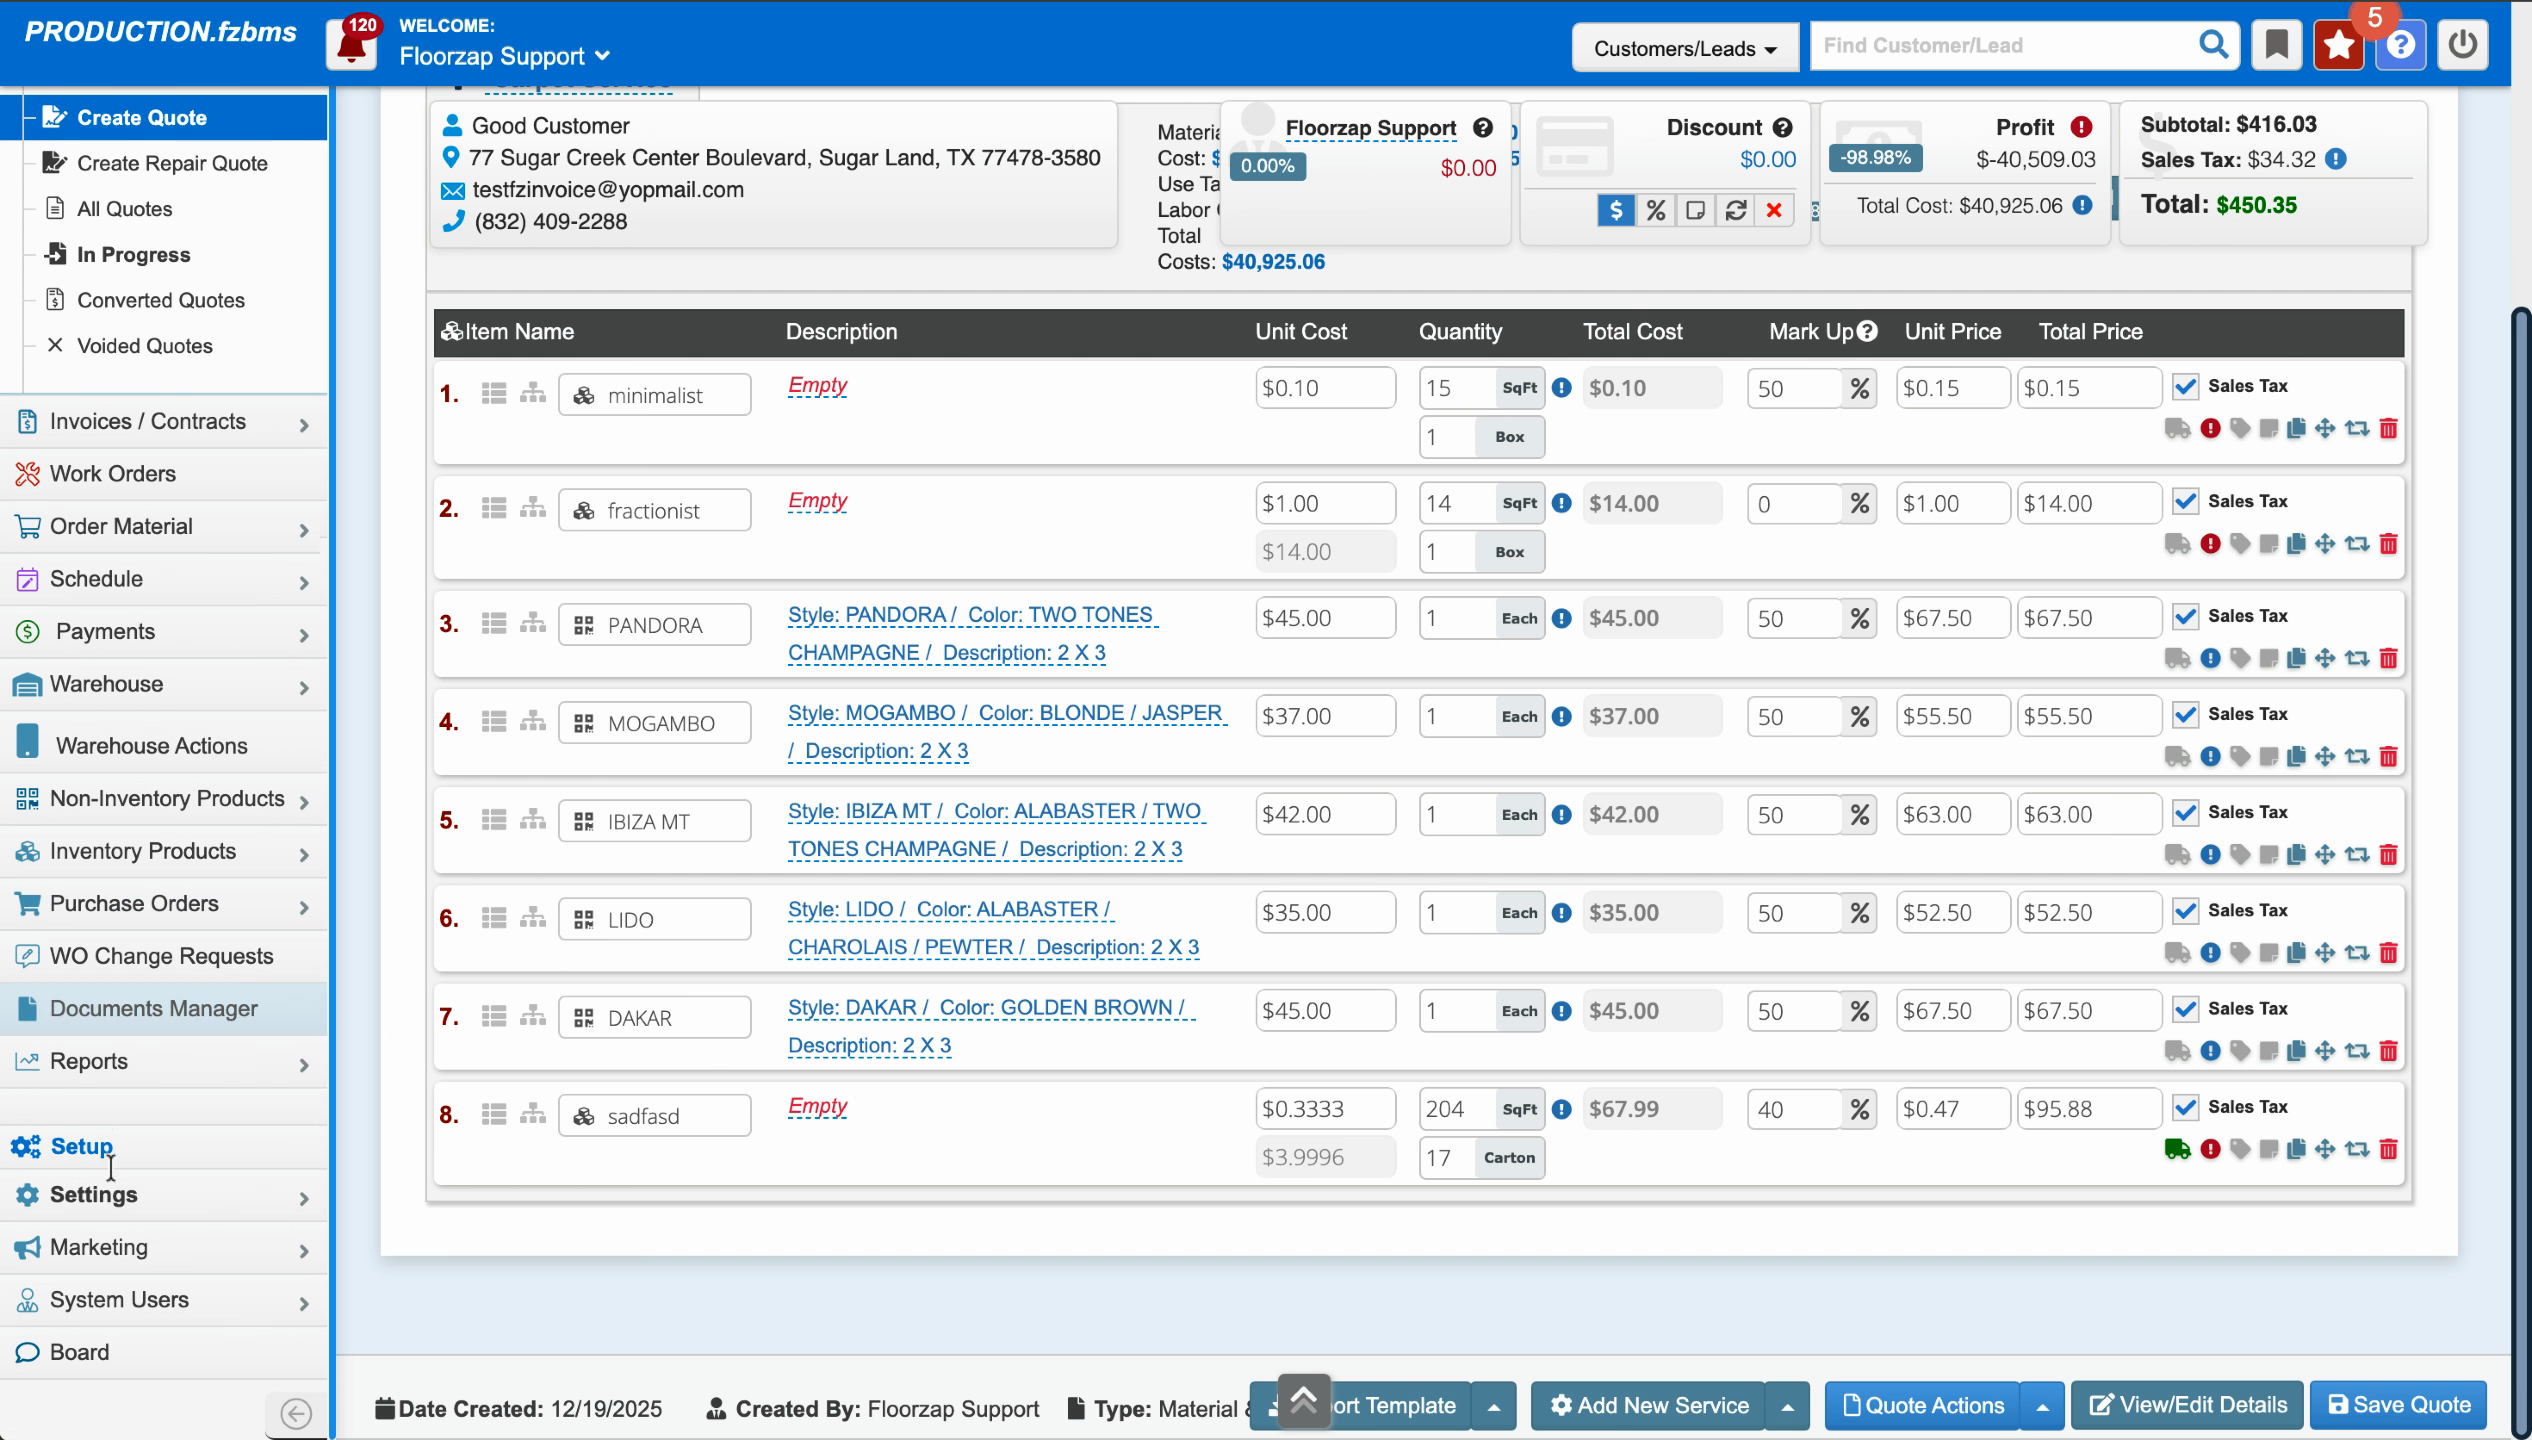
Step 6: Return to your quote to verify the updated freight rate—refresh if necessary.
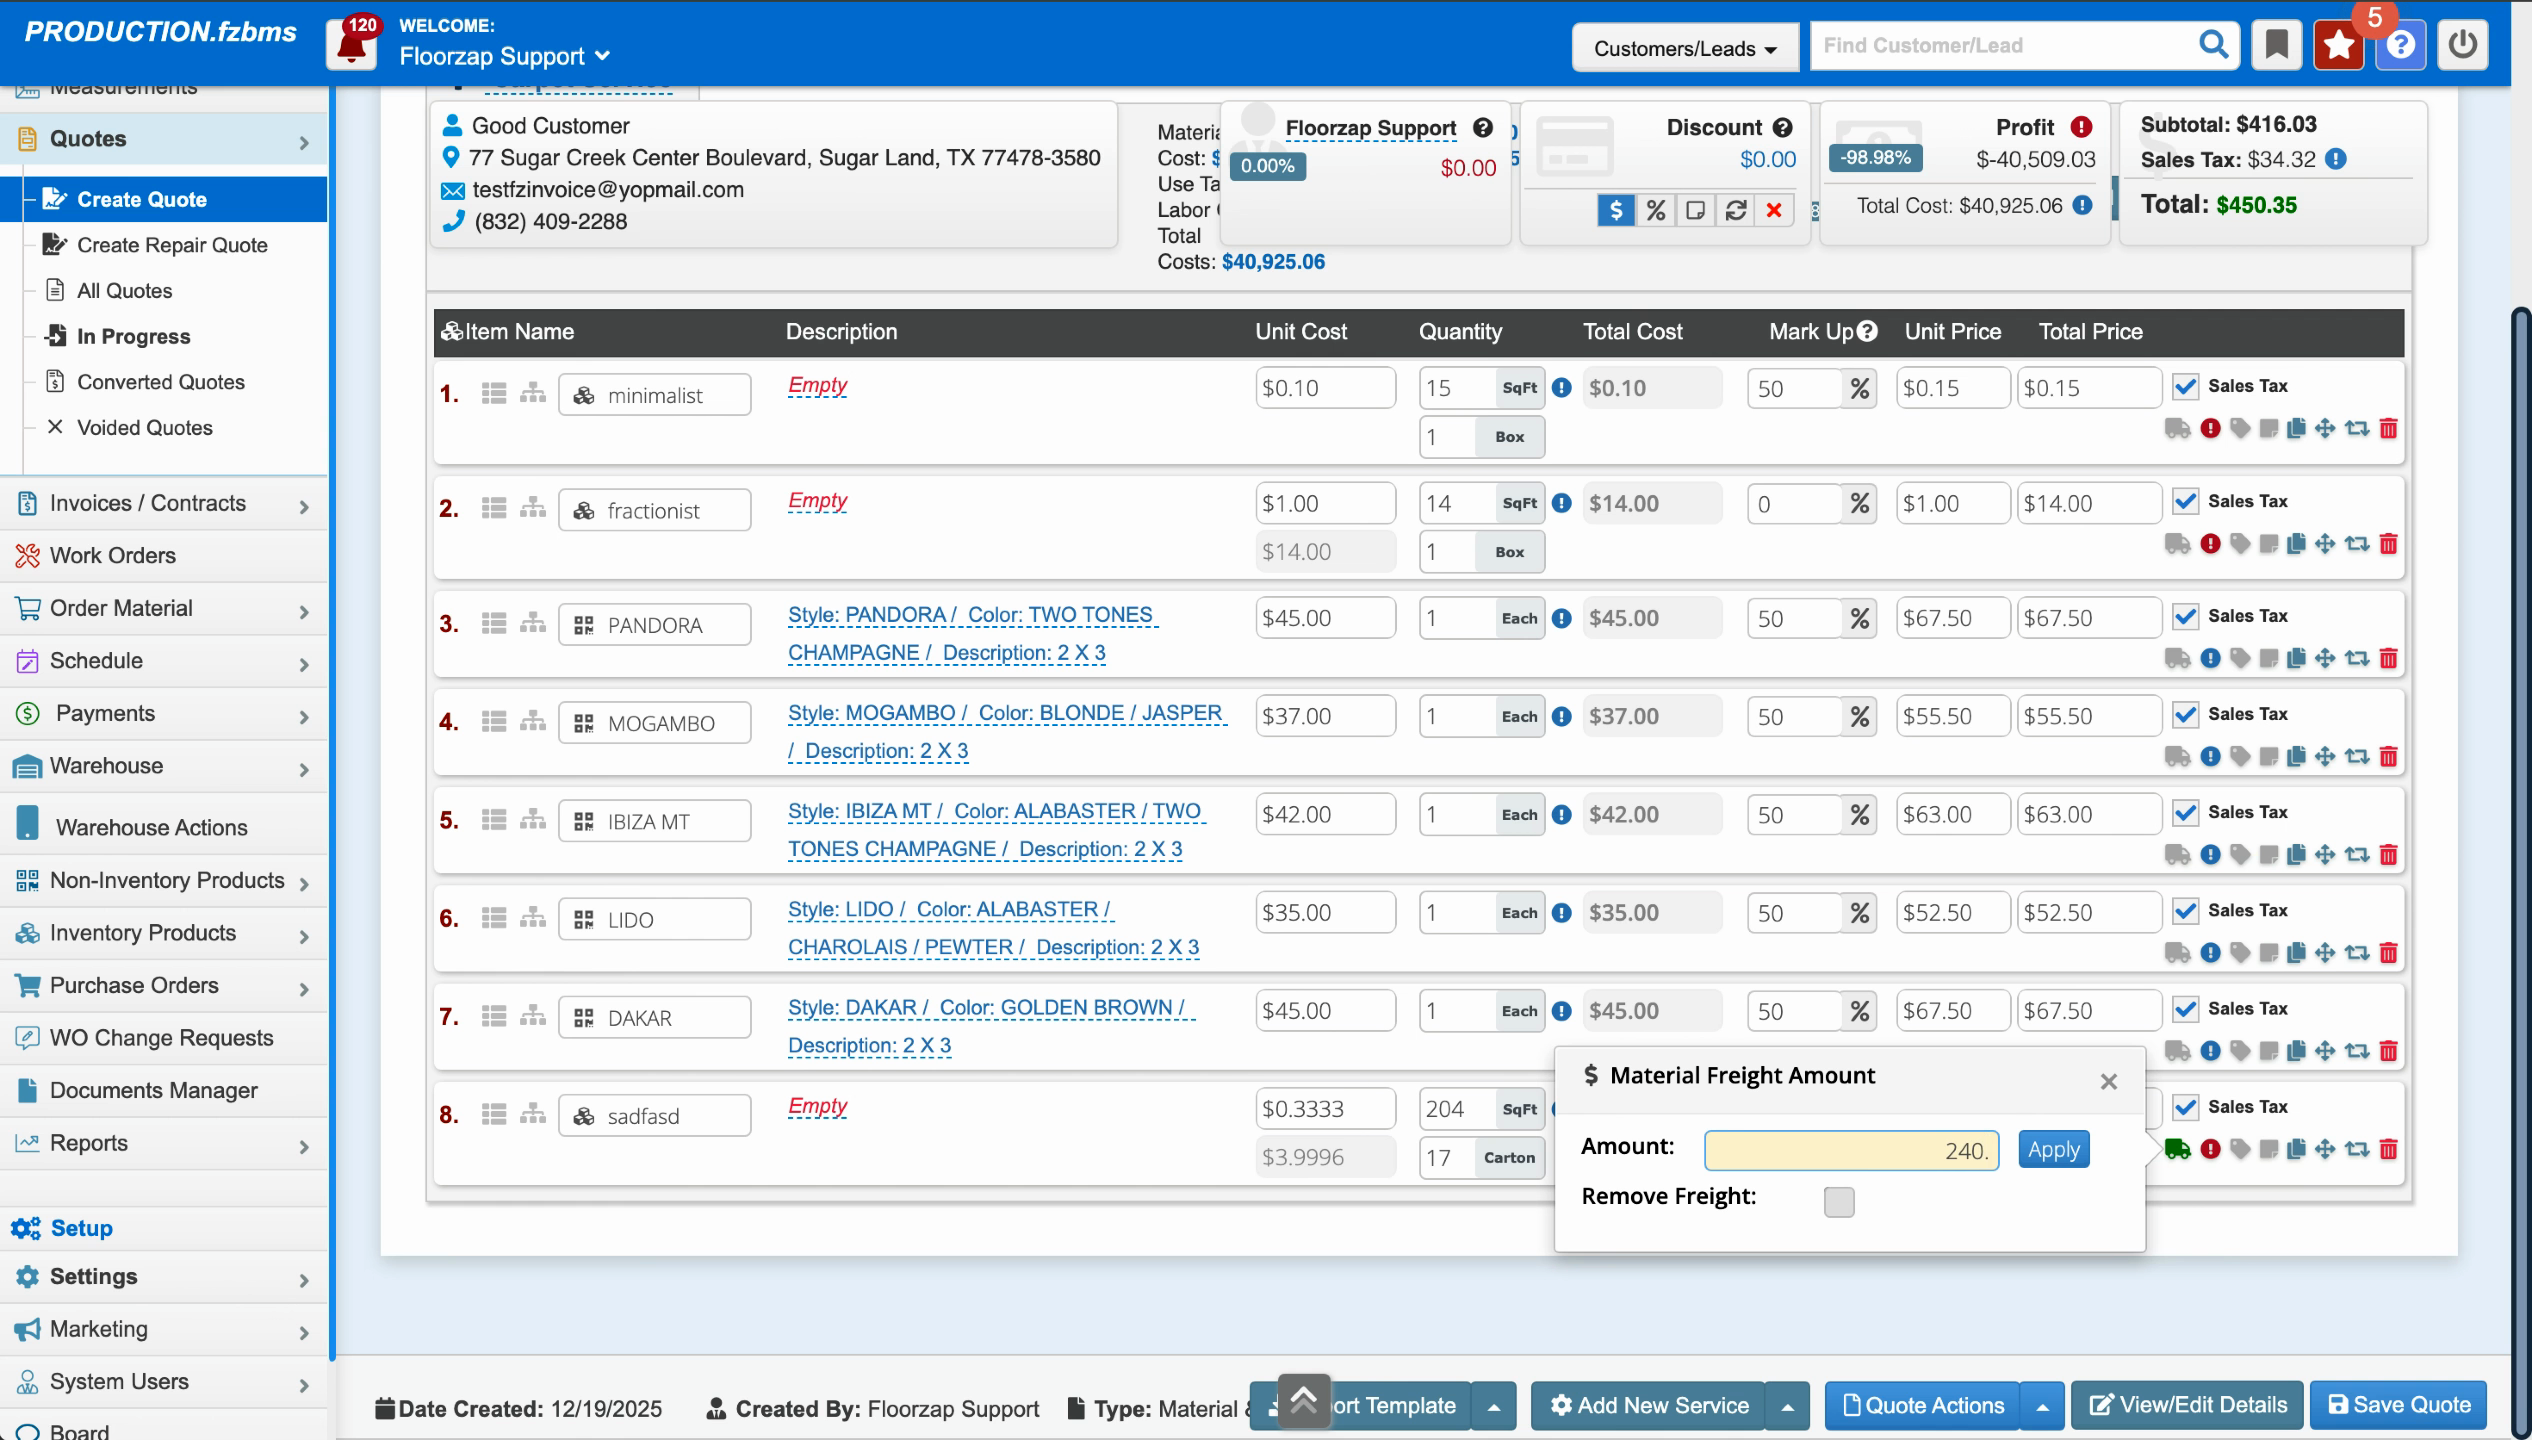
Step 7: If needed, manually enter the calculated freight. For example, multiply $0.99 by the total square footage (204 sq ft = $201.96).
Step 8: Enter the correct freight value and click Apply to update the quote.
Generating an Invoice and Reviewing Freight
Step 1: Convert your quote to an invoice by selecting Convert to Invoice.
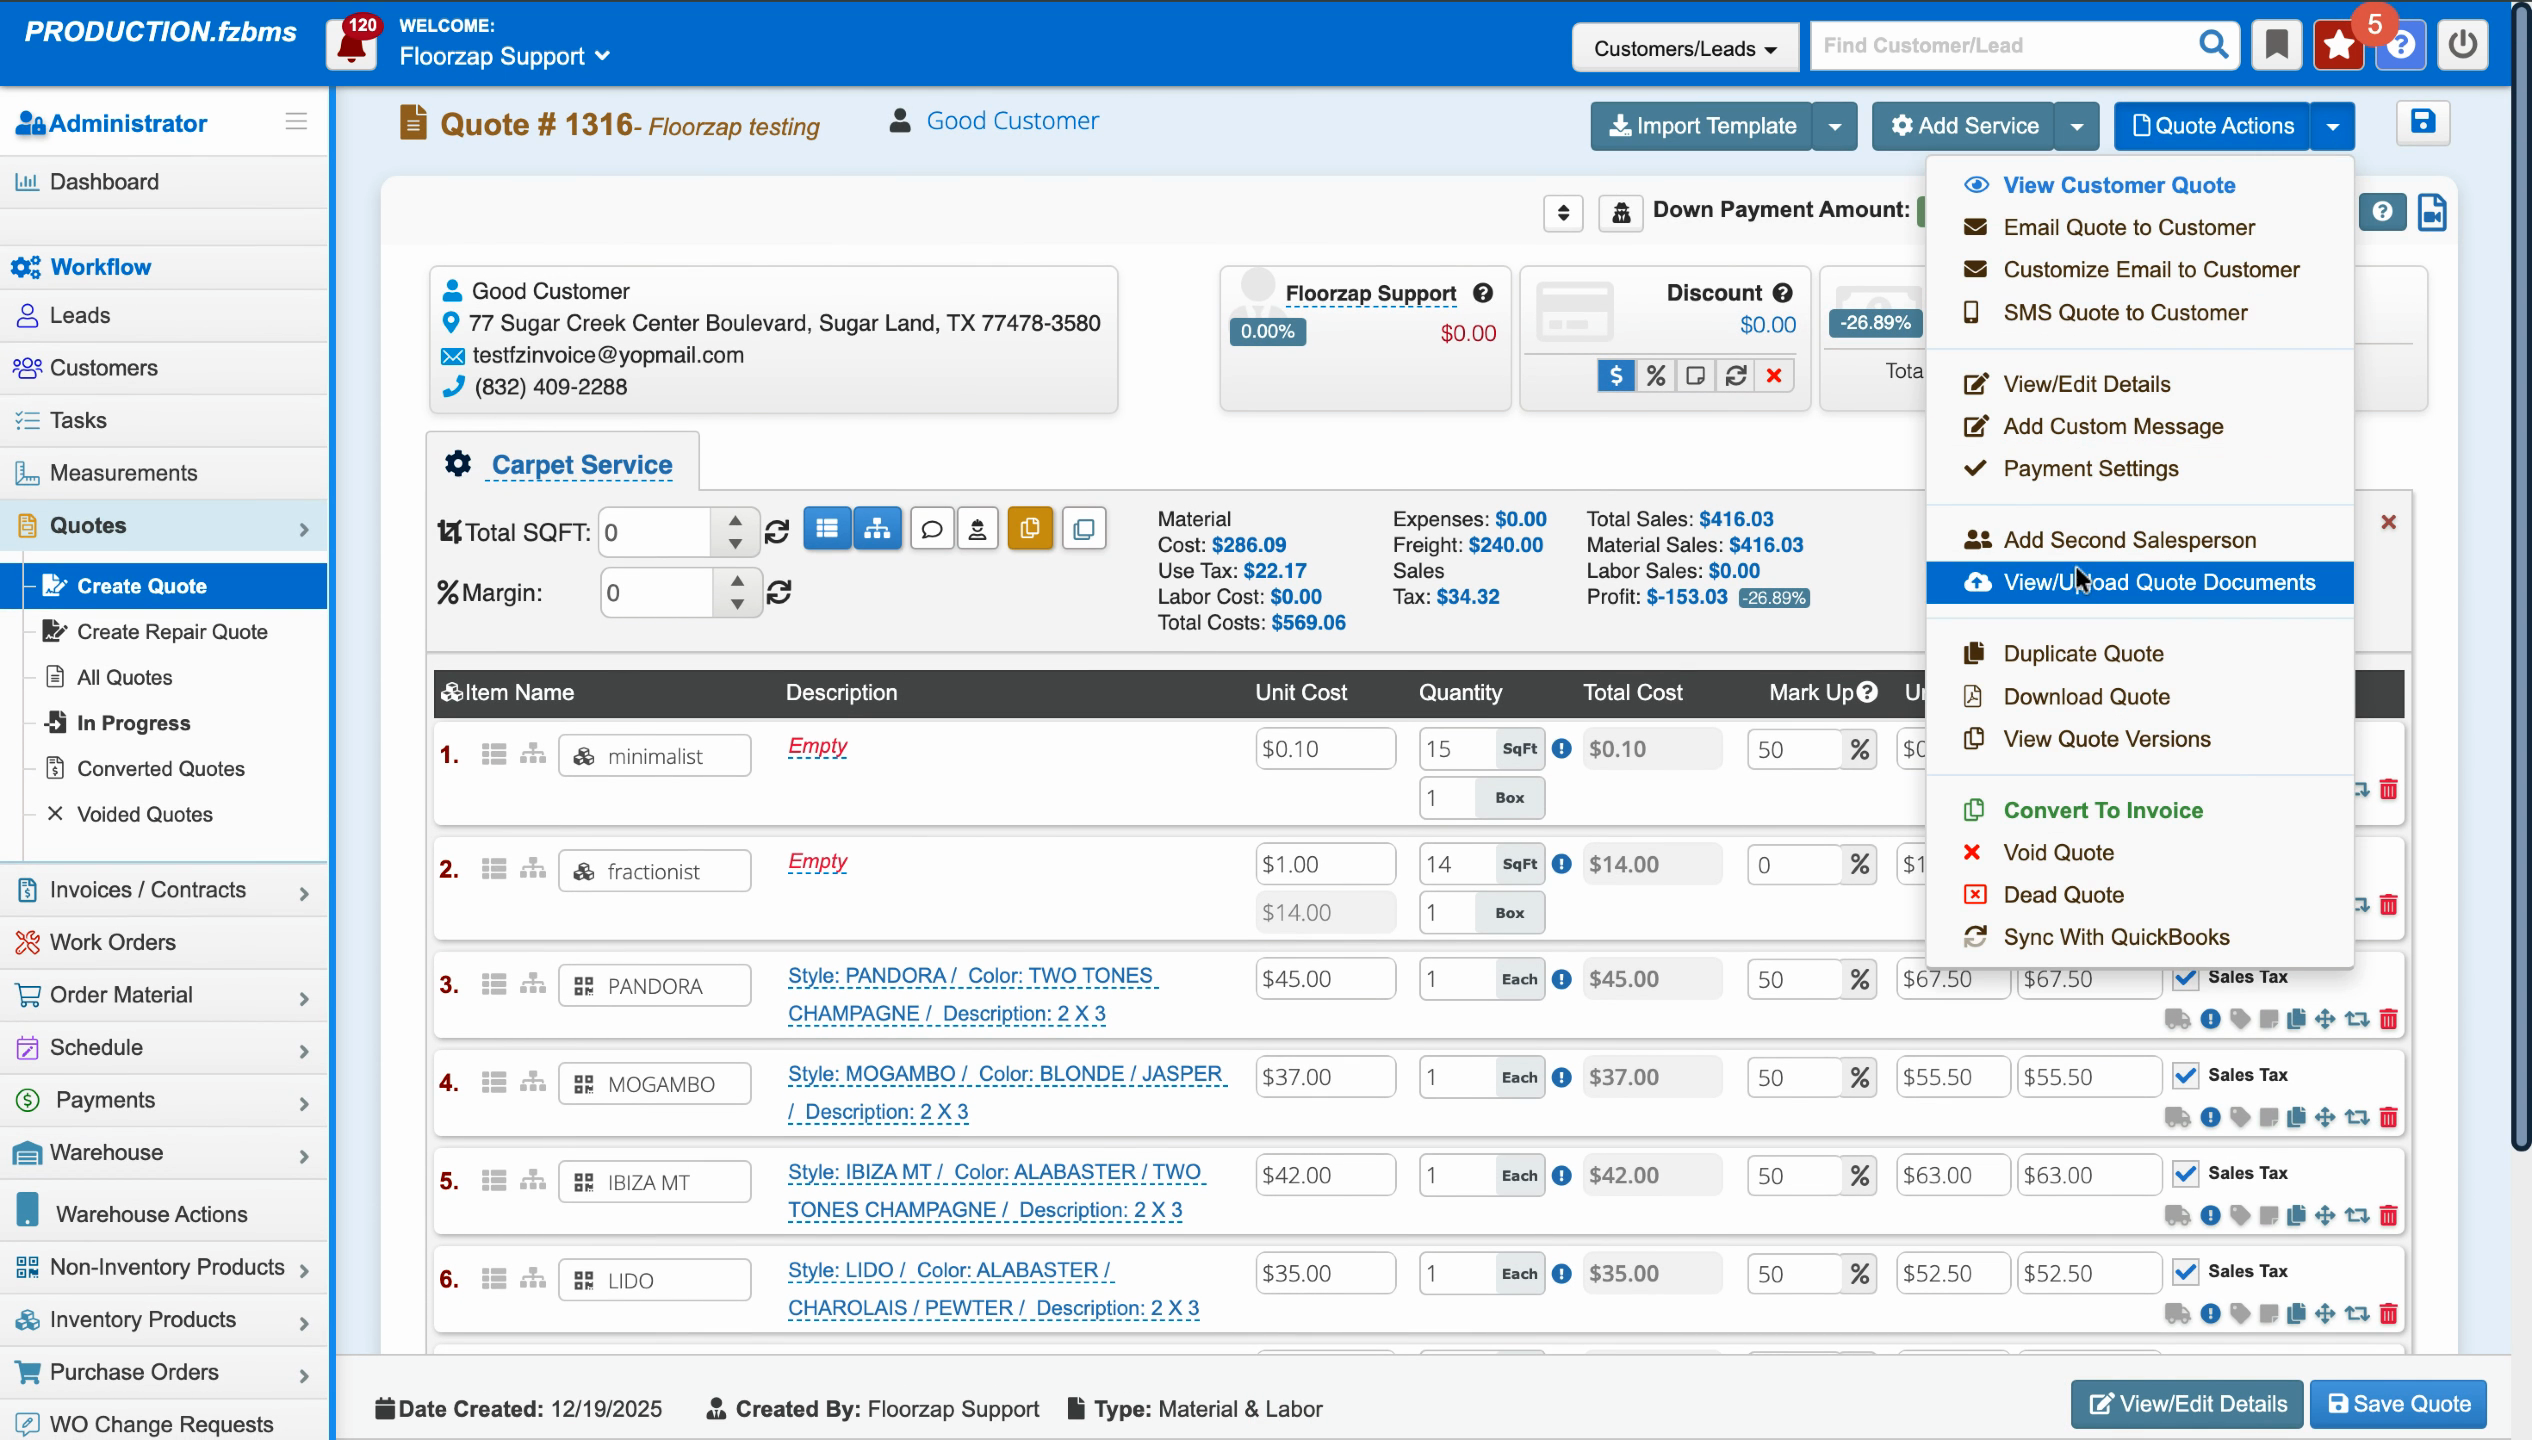
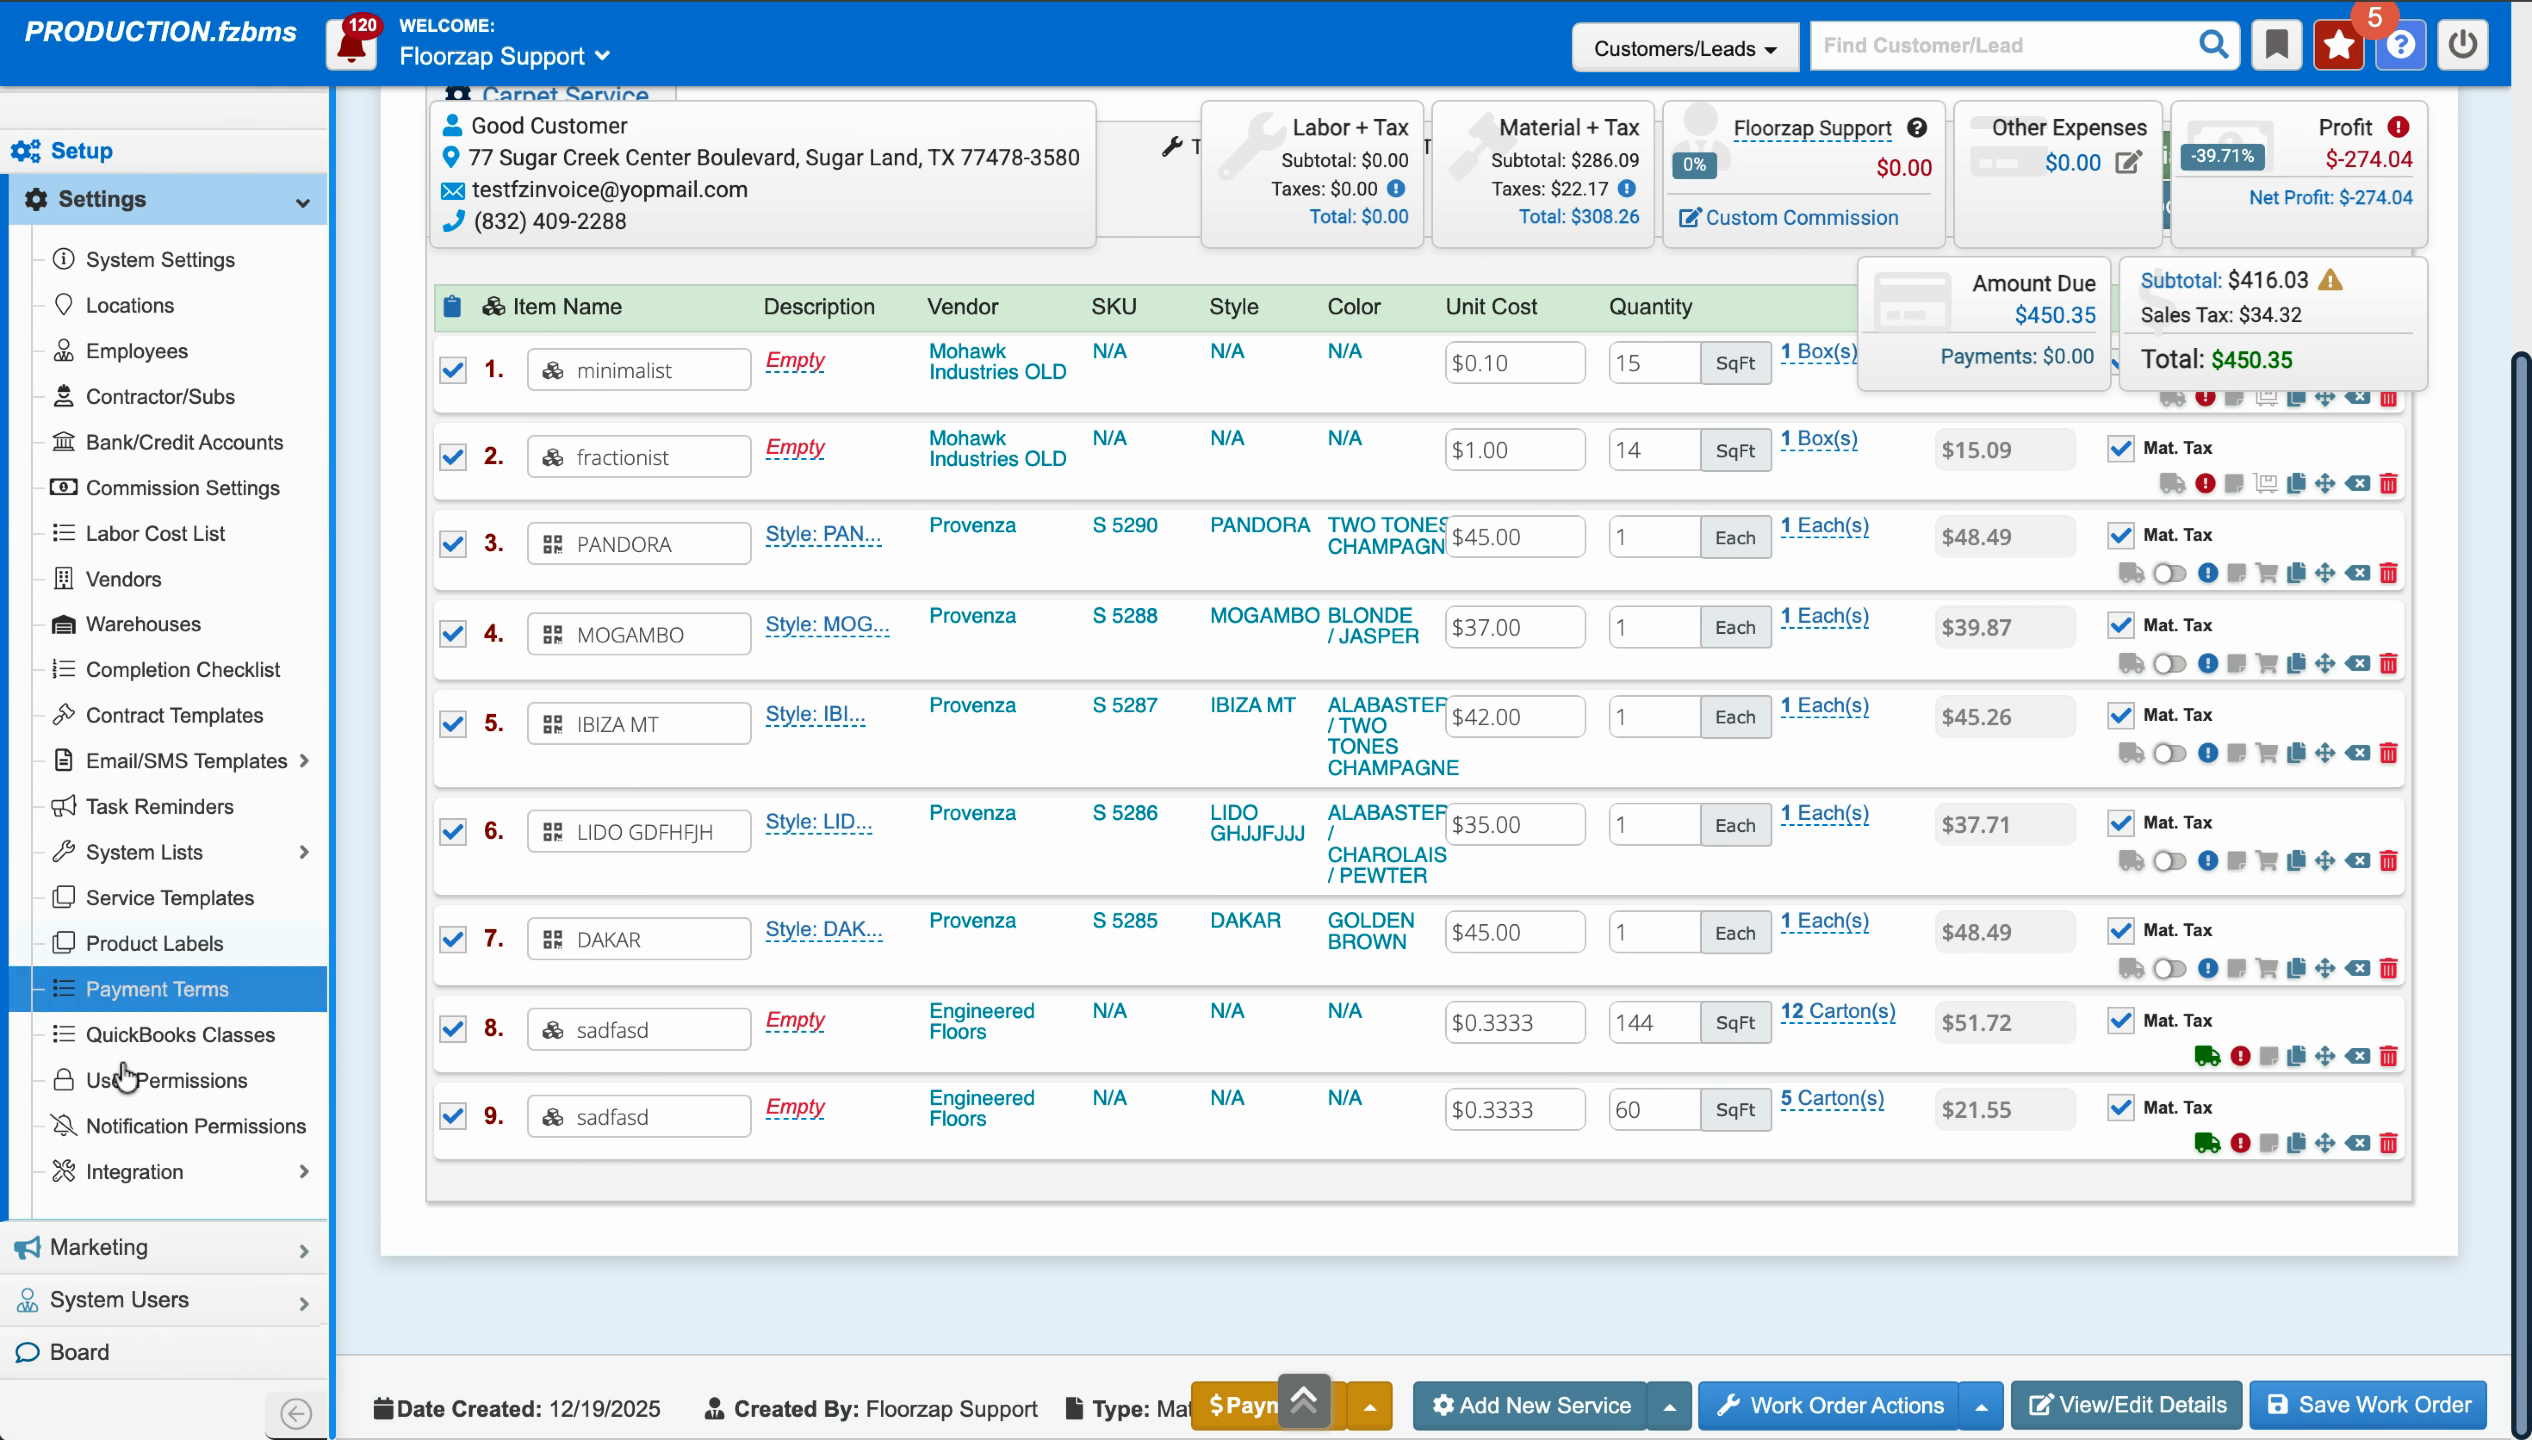
Step 2: Review the invoice or associated work order to confirm the updated freight amounts. Freight is now calculated reasonably, not at the inflated rate caused by the incorrect category-level setting.
Recap: Setting Freight by Category
To manage category-level freight setup:
Step 1: Go to Settings.
Step 2: Open Integration.
Step 3: Open Product Freight.
Step 4: Select the relevant category (e.g., Hardwood) and ensure the correct rate is saved—like $0.99, not $199 per square foot.
Ensuring your freight rates are correct at the category level can save you (and your customers) from big surprises at quoting and invoicing stages. Always double-check those settings whenever your prices or categories change.